Adobe Lightroom 2 - Whoo-Hoo! 09/08

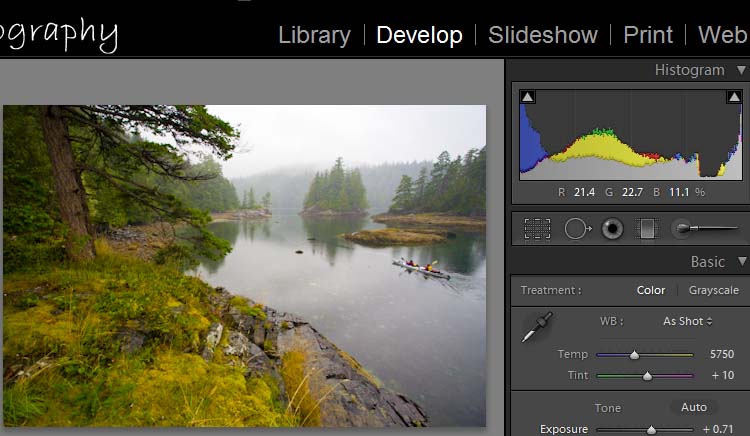
Fig. 1. A raw image with "global" improvements like exposure
correction and increased color saturation. Canon 5D, 17mm, 1/500sec, f/5.6, iso 200.
Many pros are turning to Lightroom to manage their image files. I like Lightroom because I can quickly batch process raw files and export jpgs for submission in maybe an hour where it used to take three. I also batch convert my RAW files to DNG—Adobes open source RAW format—which give me a 20% file size reduction and no more sidecar files. Another big plus is that I used to make intermediary TIFFs, each one optimized in Photoshop, and had those big files archived on the hard drive. I dont need those TIFFs nearly as often, another huge space saver. Start to finish, Lightroom has streamlined my workflow. Lightroom 2—with its ability to do targeted adjustments—means theres even less need to use Photoshop. This should mean even quicker workflow. For me, when I need Photoshop, I now can export a clean 8-bit file instead of 16-bit because it will require so few post-Lightroom adjustments.
Abobe has Lightroom 2 tutorials up on their website, with coverage of many new features, like creating smart collections that grow automatically according to your criteria, and increased integration with Photoshop. But what Ive found most useful is the Develop tools that allow targeted adjustments —the Graduated Filter and the Adjustment Brush.

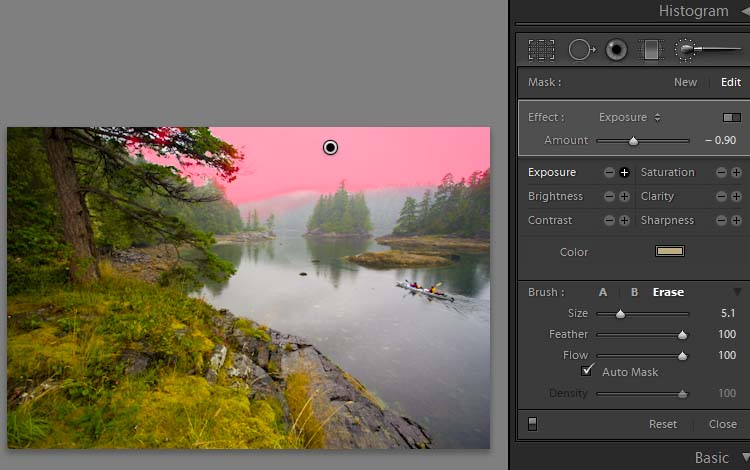
Fig. 2. Lightroom 2, with new Selection Brush tool, showing
an area selectedfor an exposure change.
If youre familiar with ND (neutral density) grad filters, Lightrooms Graduated Filter mimics that. But, as weve all experienced in the field, an ND grad can be tough on un-even horizons. So I like the Adjustment Brush—in my opinion more useful and more powerful then the Grad Filter—and deserving of a whoo-hoo for 2. A dreary day shot illustrates its use.

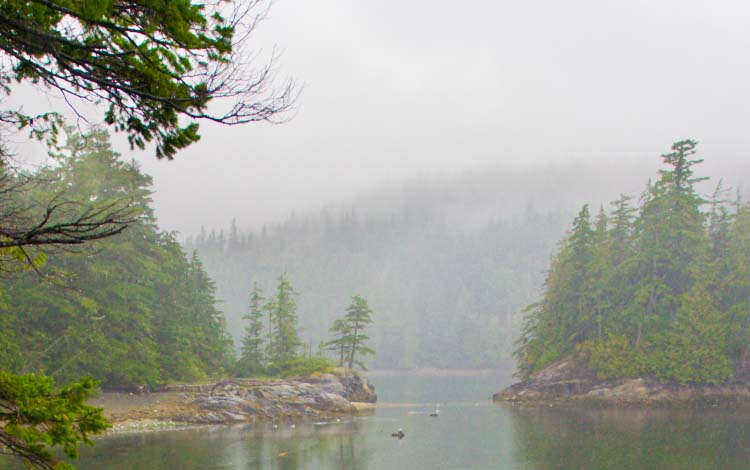
Fig.3 Blow up showing result of exposure reduction to grey sky.
Edge between sky and trees looks great.
In Develop mode, I first did global adjustments on the raw file as in Lightroom 1, increasing exposure and adding color saturation (Fig. 1). The sky, however, looked washed out, and with the tree on the left not needing the correction the sky was desperate for (i.e. not a good candidate for the Graduated Filter), I went for the Adjustment Brush. This tool has lots of choices, like exposure or saturation or color tint, etc., and they can be combined as well. Here I pick exposure only, set an appropriate brush size, and check the Auto Mask box. Auto Mask is really what makes the brush work, as it intelligently selects areas of similar tone, creating clean selections along edges. If it goofs or picks incorrect pixels—which does happen—holding down the alt key puts the tool in subtract mode. Using the Adjustment Brush takes a little practice, but I love the quickness with which I can work, and the inherent non-destructiveness.
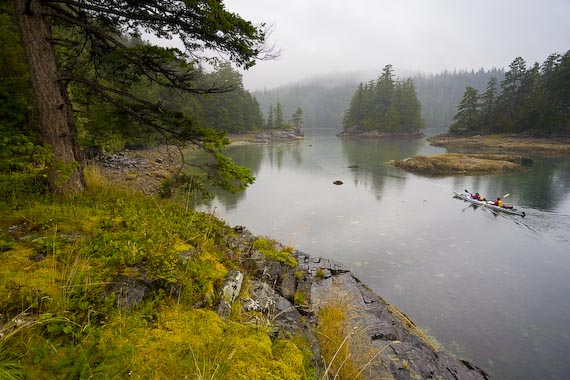
Fig. 2 shows the selection area after a minute or so of work. Fig.3 is a detail showing the effects smooth transition from the sky to the trees. Fig. 4 shows the resulting photo, with the moody sky adding to the strong diagonals to draw the viewer to the center of the frame.

Fig. 4. Darkened sky in final image gives rainy day image a glow, adds mood, directs the eye toward the center.
Gary
Also see FAQ for on-the-water advice.
