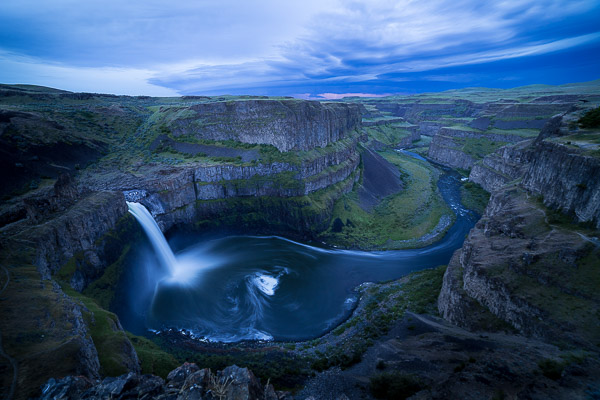
The flash of lightning greeted us as we emerged at dusk from a steep climb out of upper Palouse Canyon. My heart raced. Lightning isn’t unusual here, but this was a photo op not to be missed! I sped to the cliff overlooking Palouse Falls, a perfect ringside perch for the ensuing show. A lone photographer occupied the spot. Luckily, there was space for two or three. Also lucky, there was enough light to get a decent exposure of the canyon, and the lightning show had really just begun.
I was anxious to shoot the lightning, but I thought I better get Palouse Falls and the canyon with several exposures before the light winked out. Moonrise wasn’t until 4am. A 14mm lens mounted on my Canon 5D III embraced the scene. I bracketed exposures from 5 to 30 seconds at f8 and ISO 200. With noise reduction, it felt like an eternity to finish, but the extra light still in the canyon made the finished product noise-free (as you’re probably aware, turning on long-exposure noise-reduction causes the camera to shoot a second, dark image, with the same exposure time, which the camera then subtracts from the first shot and stores as a single file).
I tilted the camera up a bit to include more sky, to better capture the lightning. Excited, not thinking clearly, I made the mistake of shooting a few frames with noise-reduction still on, thereby missing half the strikes. After turning noise-reduction off, I shot almost continuous 15 or 20 second exposures, missing only a few bolts. As the storm got closer, I escaped to camp with the headlamp I had packed before we left on the hike.
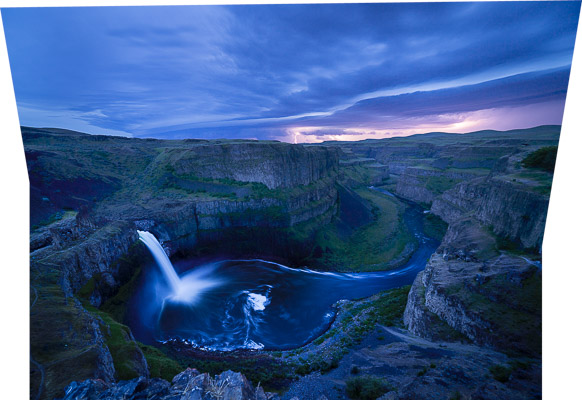
The next day, examining my images in Lightroom, I saw I had the ingredients for a decent, perhaps outstanding, landscape. I created an HDR of the canyon, then combined it using Merge Panorama to give me a base to work with. Moving to Photoshop, I added layers from two other lightning shots and blended them in. I imported the result back to Lightroom, finishing the image with some creative dogging and burning.
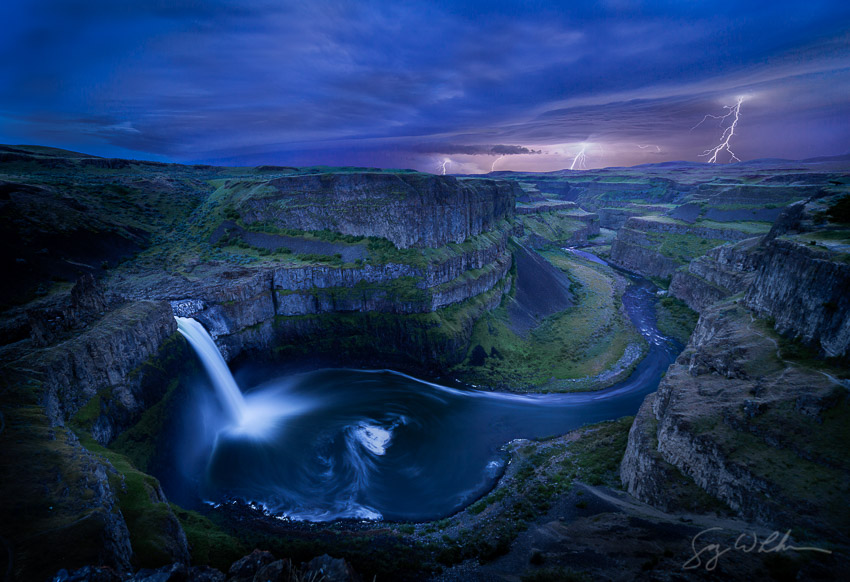
This was my first night lightning shoot in many years; a couple of keys made it successful. One basic idea is to get as many strikes as possible, with the right exposure. That means using a tripod. A remote trigger with a bulb option is helpful. Using bulb, open the shutter until you get a strike (or two), then close the shutter and start again. Turn noise reduction off; you don’t need it for lightning, and leaving it on means you miss 50% of the action. If you don’t have a remote trigger with you, no worries, just shoot continuous 15 or 20 second exposures. Manually focus on infinity. Also skip the 2-sec time delay and mirror lock, especially if your tripod is sturdy. A brief camera shake in the dark is shake un-recorded. Check your results periodically on the LCD, and adjust the f-stop or ISO as needed. For safety, head for shelter before the thunder tells you the lightning is close.
Gary