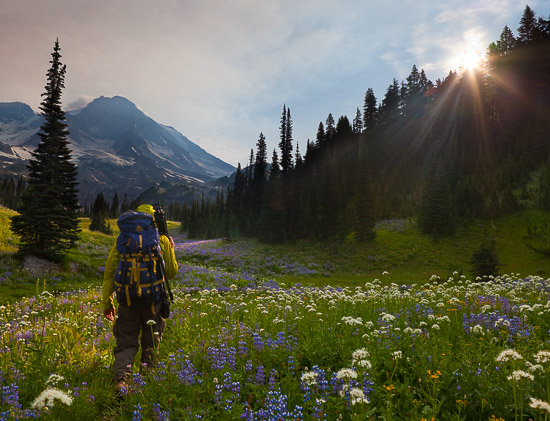
Light-weight ideas for tripod, camera case, filters and other tools of the backpacking photographer
I researched switching to a mirrorless camera for backpacking recently, figuring the weight savings and comparable picture quality would make the switch from a Canon 5D III a win. A driver of that investigation was that I skipped purchase the 50MP Canon 5DS when it was introduced; my 5D III, entering its fourth year, is getting a bit long in tooth.
Mirrorless offerings from Sony especially are appealing, but I discovered the weight-savings for full-frame don’t justify a switch. Battery life is a big issue. For a backpacker, going full-frame mirrorless is something like carrying an alcohol stove instead of a canister. The alcohol stove is lighter, but since fuel weight doubles, the edge is lost on long trips. As to picture quality, the full-frame Sony sensors get rave reviews, but then the Canon 5D III still meets my needs. An argument as well could also be made for cropped-frame mirrorless, since my old criterion of needing full-frame for magazine-cover-quality images no longer holds. But full-frame beats cropped for night shooting, even if it’s no longer mandatory for magic-hour scenics.
For backpacking photographers, in general, the high cost of swapping out camera and lens means money is better spent lightening and simplifying other gear. Unless it’s time for that inevitable upgrade, stick with the camera you’ve got. In this blog post, I look at camera system peripherals: tripod, carrying case, padding, filters and panorama gear, with an eye to trimming bulk and weight. I’ll cover the light-weighting of essential backpacking gear in a future post.
I’ll backpack in 2016 with my full-frame Canon 5D III dSLR and two lenses: a 24-105mm f/4 and a 70-200mm f/4. Add a spare battery, and the camera weight without peripherals is 5.8 lbs. If you then add the weight of a typical tripod, camera bag, etc., the total for camera gear can reach 10-15 lbs., and this is on top of all the essentials you need to stay safe in the backcountry.
Update: I’m now using a 14 oz, crop-frame, mirrorless Sony a6300 and recommend the 10 oz Rokinon 12mm f2 and 11.5 oz Sony 18-135mm f3.5-5.6 for a hard-to-beat, two-lens, light-weight backpacking combo.
With a bit of research and experimentation, I’ve shrunk my camera peripherals weight to less than 3 lbs. This puts my total camera gear weight under 8.5 lbs for full-frame, two lens. If I drop the 70-200mm and carry just a single lens—say for a difficult or high-mileage trip—the weight drops to 6.61 lb. Of course, lens choice isn’t gospel. If I want to shoot the Milky Way, I drop the 24-105 f/4 and carry a 24mm f/1.4 instead. Below are my peripheral choices that lighten the load regardless of lens choice.

Tripod. The heaviest single piece of auxiliary gear is usually the tripod, but it’s essential. And although you might consider a table-top, those tiny stabilizers sacrifice just too much when you’re out in sweet mountain light, struggling to design that decisive shot. My current tripod choice is a 23.1 oz (padding removed) carbon-fiber Oben CT-2331. It stands 45 inches without center column. The Oben has very useful spiked feet, a bubble level and adequate stability. At 1.44 lb, this is truly light-weight. The 45-inch height is a bit of a cheat because to get there the fully-extended legs are closer together that most tripods ( See my complete review here). For ballhead, I like the 13.3 oz Markins Q-ball Q3i. I haven’t found anything as good for the weight.
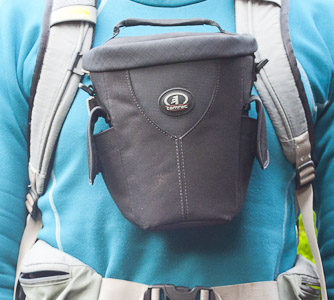
Camera bag. A Tamrac 3330 Aero Zoom 30 Case (196g 6.9oz) is just barely big enough for my Canon 5D with the 24-105mm f/4 lens attached. I clip the chest harness of my backpack through the bag’s belt loop, giving me quick access to hand-held shots while hiking: Unzip, take a shot, return to bag. I hardly even stop walking. A downside of this carry method is you lose a bit of vision down toward your feet due to the high position of the bag against the chest. I haven’t had a problem with this in six years on the trail, but I do see a potential trip hazard. Women may find the chest carry more of an issue than men, and want a hip or waist pack. An alternate chest choice is the Lowepro Toploader 50 AW II, an ounce heavier, but with bigger internal dimensions, a larger accessories pouch and a built-in rain cover. If you have a crop-frame, mirrorless camera, look at the Tamrac 3330 little brother, the Jazz Zoom 25, just 5.8 oz. For a cleverly-designed waist (fanny) pack, swung forward for access on the trail, check the 10.5 oz Clik Elite Sprint.
Filters. Most backpack trips, I carry a single filter, a 77mm polarizer that fits my 24-105. I don’t carry split ND filters. Instead, get superior landscapes by bracketing two (or more) exposures and combine them in Photoshop. If I take my 70-200, I may carry a 67mm to 77mm step-up ring that serves to replace a 67mm polarizer. I also may take a 77mm 6-stop ND filter, for silky sunlit waterfalls or ocean waves. I thread the ring and filters together, rap with a shower cap, and slide them into a side pouch of my Tamrac camera bag while hiking, all tucked away and convenient except for one thing. Using a step up ring on a telephoto lens like the 70-200mm means you probably won’t be able to mount the lens hood, breaking one of my long-held rules: Always shoot with a lens hood. You’ll have to decide what’s most important.
Flash memory. A single 32GB SD card serves for an entire, multiday trip. With all the many things that can go wrong in the field, efficiency and simplicity clearly win if you never have to swap a card out. Shooting RAW, 32GB holds 1200 images on my Canon 5D III. If you need more than that, you’re shooting too much; scout more and shoot deliberately. Heck, two or three batteries will run down without filling a 32GB card, assuming normal scenic shooting, some live view and a bit of shot review. Use your second card slot for back-up if you feel the need.
Lens padding. Commercial padded lens cases are padded overkill, too thick, too heavy and not waterproof. I’ve had success housing my second lens in a sock inside a ziplock freezer bag. This is lighter and more waterproof than what you can buy; not as accessible as a purchased holster style that clips to your hip belt.
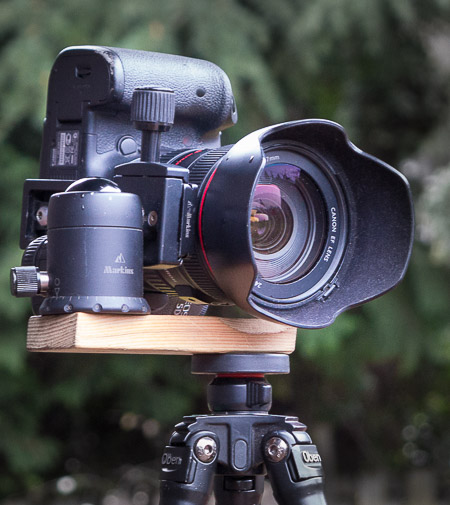
Panorama tool. To shoot consistent panoramas without parallax, I use a Markins PL150 long plate (77g 2.7oz), in combination with a home-made wood panorama tool of my own design. This allows single-row vertical pans with close foregrounds that blend easily without problems in post.
Magnifying glass. For night shooting, auto-focus doesn’t work. To manual focus the night sky, I don’t rely on the infinity marks on the lens. Instead, I use the camera LCD at 10x for focus, and I use a magnifying glass to get the focus precisely right. A multi-use tool that can be used for that purpose is the Silva or Coghlan’s four-function whistle, .8 oz, which includes a whistle, thermometer, compass and magnifying glass in a light-weight package.
Other accessories I carry are a Canon remote cable release TC80-N3, a cleaning cloth in a light-weight zip, a shower cap for rain-protection, and a headlamp with a red lamp option for better vision when night shooting.
One last note: Always clean your lens and filters, and check your sensor for dust, before each trip. When you clean at home, first wash your hands: dirty fingers oil your cleaning cloth and make cleaning much more difficult.
Gary