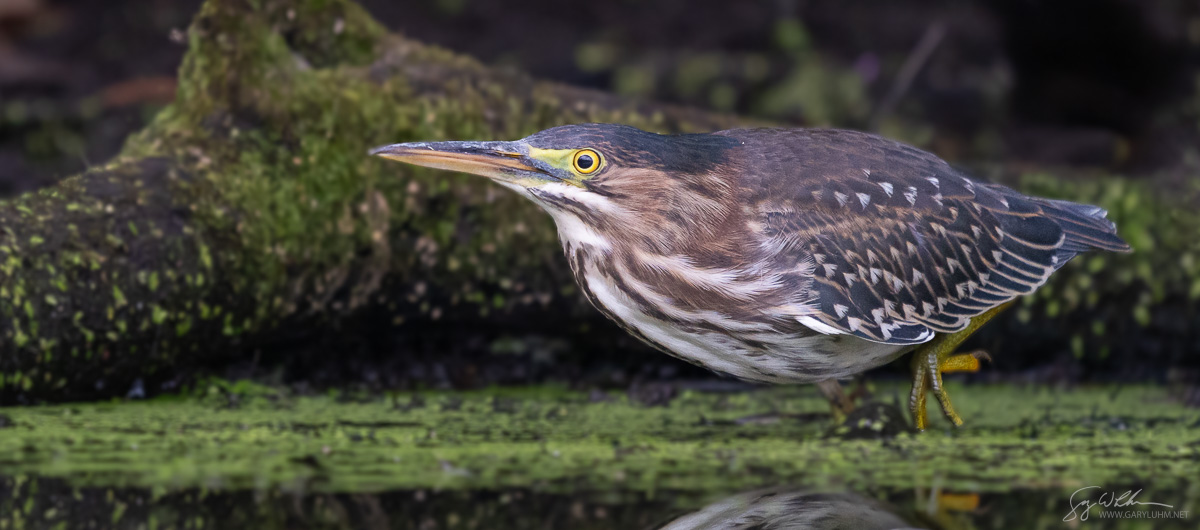
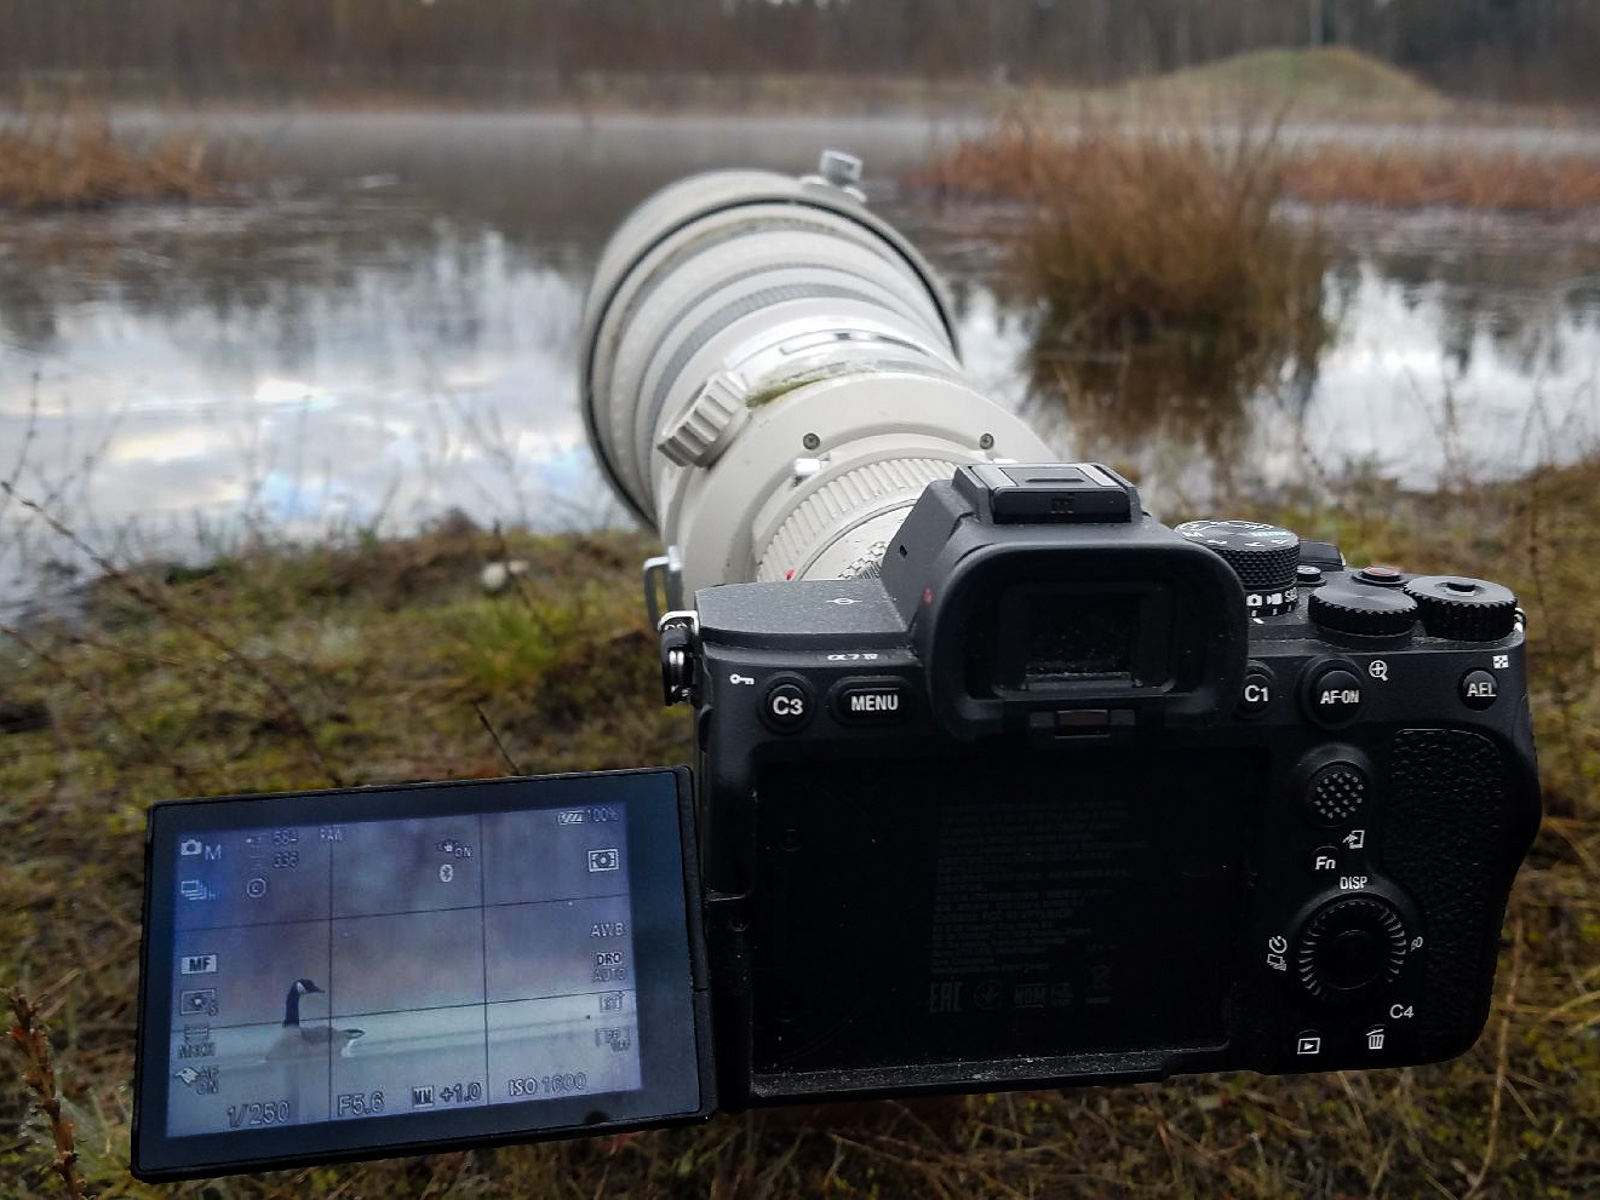
Sony A6700, 100-400mm f4.5-5.6 @ f5.6, ISO 1250, 1/250s
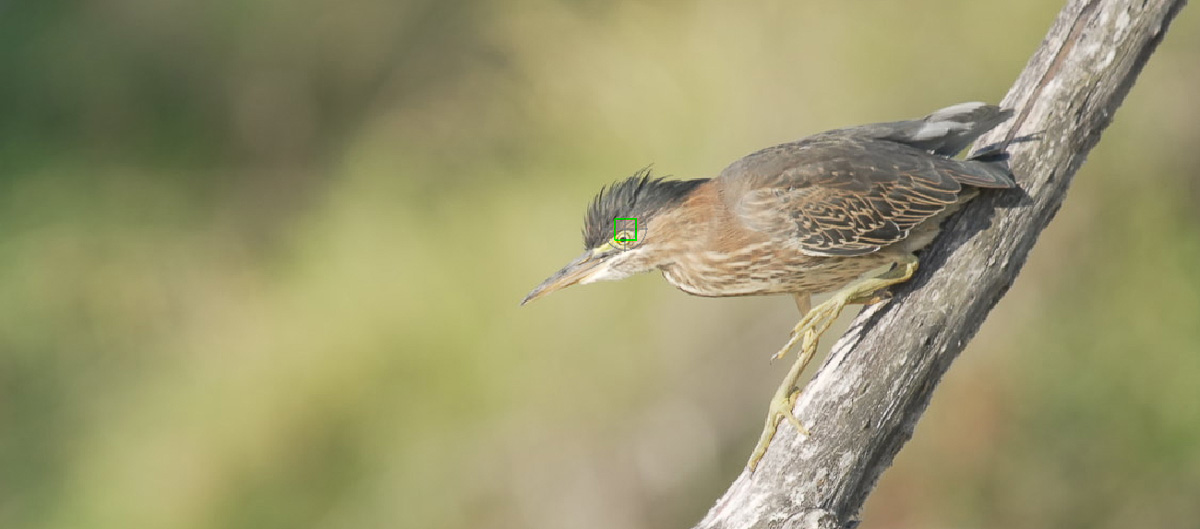
Wildlife photography is forever changed with the advent of fast, accurate, eye-detect-focus mirrorless camera sensors. With bird-eye tracking enabled, the camera (usually) detects the eye, and follows the eye even if the eye exits the focus area. This is huge. It makes composition and sharp-in-the-eye image capture easier, more likely and even (sometimes) corrects operator error.
 For Sony, remarkable implementation of bird-eye focus moved from the ground-breaking A1 through other professional models and on down. With the Sony A6700, introduced in July, 2023, a dedicated auto-focus chip is a first for Sony’s APS-C line-up. Focus speed doesn’t match the A1, nor does frame-rate, but focusing impresses for a $1400 camera.
A6700 Bird Photography Settings
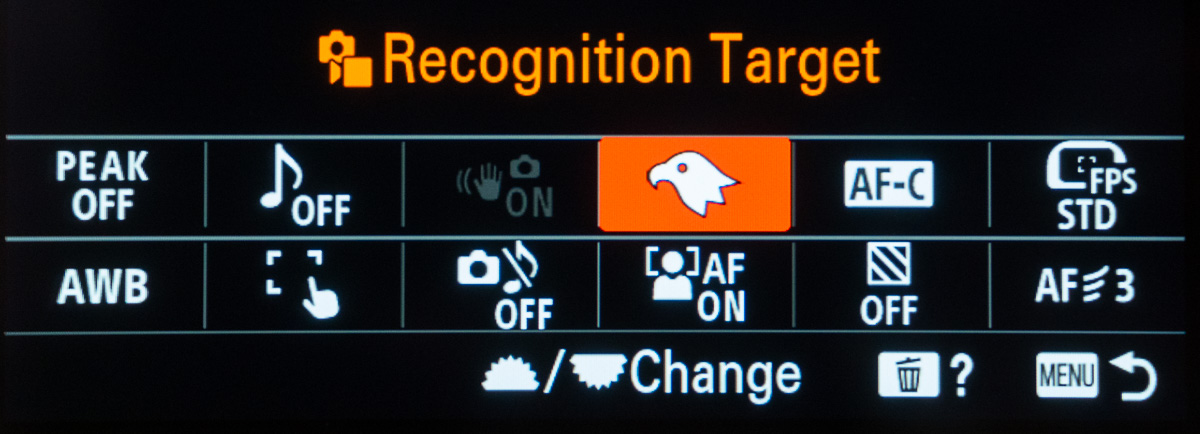
Our goal is to set-up the A6700 so you don’t have to enter the main Menu when in the field, or even move your eye off the viewfinder (EVF). Set up dial and custom buttons to cover the most important bird photography needs, and access Fn (menu short-cut button) for the remainder. Some settings are straightforward. Shoot in RAW. RAW gets you more dynamic range, and with RAW you can adjust white balance in post without loss. Set Aperture to wide-open; most recent telephoto lenses are remarkably sharp set to the widest aperture. Set Recognition Target to Bird, Set Subject Recognition Target to ON. This is key. You want the camera set to track the bird’s eye.
Sony offers multiple focus-area options. Set Focus Area to Tracking: Zone or Tracking: Wide, but have an easy-to-feel button set to access it (I use C2) because Focus Area is situational. If you can’t quickly pick up the bird’s eye because it’s too far away, try Tracking with Expanded Spot, place it in the center with the control wheel and move as needed. I also use Tracking with L, M or S, but less frequently. S can be a problem because to focus you need contrast, and S, being so small, often can’t find an edge to focus on.
Set focus mode to Continuous (AF-C). This should be obvious for moving subjects like birds, but even for perched birds, avoid Single (AF-S). In the old days, AF-S was useful for perched birds because you could press the shutter button half-way, acquire focus, and then re-compose. With bird-eye focus and AF-C, though, once the sensor acquires the eye, you can also re-compose with shutter held half-way, including even placement out of the focus area, since the focus point is sticky.
Frame-rate set to H+ or H. I mostly use H, maximum 8 fps. With H+ (11 fps), according to the help manual, my experience and Mark Galer the EVF does not show real time but shows the last image between bursts. H—although a lesser frame-rate—allows real-time tracking and auto-focus between shots and hence sticks with the bird (or bird eye) better. Galer recommends H when panning. However, by shooting in short bursts and then re-acquiring focus, I get an extra shot off with H+. Bird coming at you, H+ is probably ok. Pick your poison. For perched birds, if you have the time to change the rate, frame-rate M (medium) or L (low) cuts the number of images shot and can save on time in post with less images to deal with.
Electronic or Mechanical Shutter? Mechanical shutter has a reassuring sound and you’re instantly aware images are captured, as well as supposedly better dynamic range. Fastest mechanical shutter is 1/4000s, frame-rate 11 fps. Electronic shutter is silent, fastest shutter 1/8000s, frame-rate also 11 fps. Silent, however, means you don’t know how many images are recording or even if you’re recording at all (requires a glance at the vertical bar left of the viewfinder screen if set up that way). It also often causes fast-moving wings of small birds to distort into bizarre shapes (just like stills extracted from video). The A6700 has faster readout than many in this, with a speed of 25 milliseconds. Compare the Sony A7R V at 99 ms; high-end A1 clears at 3.8 ms. A6700 mechanical shutter curtain is 3.2 ms, so not an issue. All that said, use the electronic shutter for close-in birds, or whenever the bird reacts to the mechanical shutter.
Set EVF frame-rate to 120 frames/sec. It’s worth remembering that the viewfinder is a video feed, not real-world, despite, or because of, WYSIWYG. Standard frame-rate is 60. At 60 fps, a bird flying at 40 mi/hr moves 58 ft/sec. If you refresh at standard 60 fps, the bird moves about a foot with each refresh. So you click the shutter thinking the right-to-left flying bird is flying into the frame, then in review see it’s flying out of the frame. Refresh at 120 fps, bird moves 6 inches. For reference, refresh rate for the Sony A1 can be set to 240 fps.
Tracking Sensitivity refers to how quickly the camera reacts to the introduction of a new potential subject within the frame. I set AF Tracking Sensitivity (Responsiveness) to 3 (standard¬¬) or 5 (locked-on) for most situations. If I’m worried about a bird flying behind an intervening object I use 5. That way, say if a bird flies behind a tree only to emerge on the other side, the focus sticks with the bird and doesn’t instantly re-focus on the closer object. 5 also works if you’re worried the focus will jump to the background for hard-to-track BIF. A Responsiveness 1 setting can be useful for erratically moving birds. I like the 1 setting in combination with a central small (S) focus-area if I’m in close, usually used for kinglets and warblers flitting about in shrubbery. I access AF Tracking Sensitivity in the Fn menu.
Set Mode dial to Manual (M). Especially for moving subjects like birds in flight, background can change from deep shadow to sky in an instant. M handles this well. Aperture (A) not so; Auto ISO not so. As Charles Glatzer says, “same light, same exposure”. Aperture can be good if you can control background and subject size when light is changing as with partly-cloudy skies, but you need quick access to exposure compensation. I stick with M.
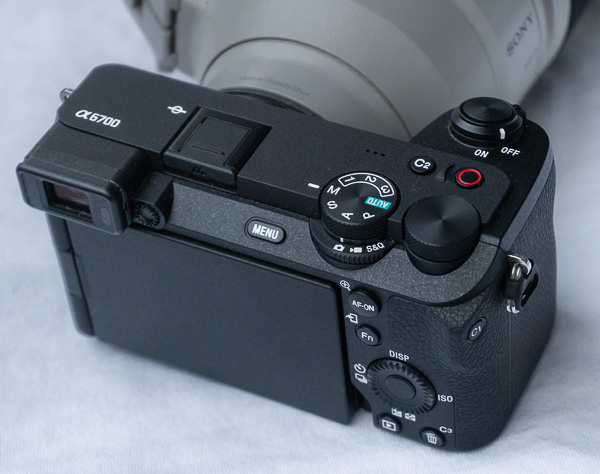
Also on the Mode dial are three custom settings available at the twist of the dial. I set up C1 for my standard bird settings. That way, if I’m shooting landscapes, for example, and a bird opportunity suddenly appears, a quick turn of the dial lets me engage with the bird. I haven’t set C2 or C3 yet. C2 will be for landscapes. C3 is undetermined, but portraits would be a good choice, à la Mark Galer.
Discussion: The small body size of the Sony A6700 means less room for dials and buttons, effecting set-up relative to full-frame bodies like the A7 IV or A7R V. It’s convenient toting a small camera. But small size also means less space for dials and buttons. Specifically, on the full-frame Sony A7R V or Sony A7 IV, separate, dedicated dials, two top and one front, control Aperture, Shutter Speed and ISO out of the box. The Sony A6700 only has one front and one top such dial, controlling Aperture and Shutter. ISO gets relegated to a back-wheel, two-step change. I like shooting in Manual (M). If I have to change ISO, though, valuable seconds can be lost compared to a dedicated top dial. This may make A or Auto ISO more appealing, but no, stick with M anyway.
ISO settings can be an issue since this is a crop-frame camera. Pixel size is the same as the 60MP Sony A7R V (60MP / (1.5 x 1.5) = 26MP, with similar noise. For portraits, I tend to use a lower ISO and slower shutter speed then I otherwise might, which means less noise but also more throw-aways from steady-shot error, hand-held shake or bird movement. For flight shots, I might lean toward blurry motion instead of sharp capture (high ISO) when light is limited.
For Sony cameras not the A1 or the latest A9, it’s best to shoot short bursts (three or four), let the camera re-acquire focus, and then another burst. Fast-moving birds I find impossible to track when continuously holding down the shutter. Hold off until action peaks is a smart strategy (this is never easy).
Sony (and other) telephoto lenses contain several switches for focus options. Set auto-focus switch to ON. A second switch determines focus range, typically 3 meters to Infinity or Full Range. Set 3 meters to Infinity for most work; be sure to change it for small birds like hummingbirds. Optical Steady Shot should be set to ON unless you’re dealing with fast shutter speeds (> 1/1600s). If you’re photographing BIF, Steady Shot is best left off.
A useful Sony feature allows special assignment to some buttons thru Recall Custom Key. I assigned one Recall to the AF-ON button, which when pressed yields a f5.6, 1/2000s shutter, exposure compensation 0, auto ISO, max ISO 6400. The AF-ON button is easy to find with the thumb while looking thru the viewfinder, so it’s quick and serves for those situations where, for example, you’re photographing perched birds at a low shutter speed (and low ISO) and suddenly a different bird flies by. Also easy to find, I assigned the lens button (Sony telephotos have this) to f5.6, 1/320s, auto ISO, min ISO 400, a typical low-light exposure that I frequently encounter in the shade. Registration for Recall Custom Key can be found in Shooting>Shooting Mode>Reg. Custom Shoot Set>Recall Custom Hold 1 (or 2 or 3). Key (Button) assignment is found in Setup>Operation Customize>Custom Key/Dial Set. Then scroll to the appropriate button.
Questions? Enter in the comments and I’ll answer as best I can.
Gary