One of my favorite and frequently-used post-shoot techniques is darkening the sky, adding drama to an outdoor image. A natural dramatic sky—vivid sunsets, ominous cumulonimbus or wispy cirrus clouds—are a lusted-for backdrop, but oh so fleeting. Much more common are plain gray skies—or a blue sky devoid of interesting clouds. In a typical photo, the sky is bright or washed out, causing the eye to wander up and then away—away from the image. We lose the viewer. Whatever the look of the sky, darkening it improves the photograph by drawing attention to other bright areas in the scene. A dark sky unconsciously directs the eye in toward your foreground subject.
Split ND filters were a necessity in the film days, but today I rarely use them. They’re not practical for hand-held action. For scenics on a tripod, I perfer an alternate method of shooting multiple exposures for later work in Photoshop, where two of these exposures combine for similar but better-controlled results compared to the split ND. I merge an underexposed, dark sky from one image with a brighter, well-exposed foreground from another, using an adjustment layer for flexibility.
With the advent of Lightroom 2 and its selection tools like the adjustment brush, it’s no longer necessary to go to Photoshop to create the well-exposed image. The following technique keeps you working on a single image in Lightroom (2 or 3), avoiding that trip to Photoshop, a nice advantage.
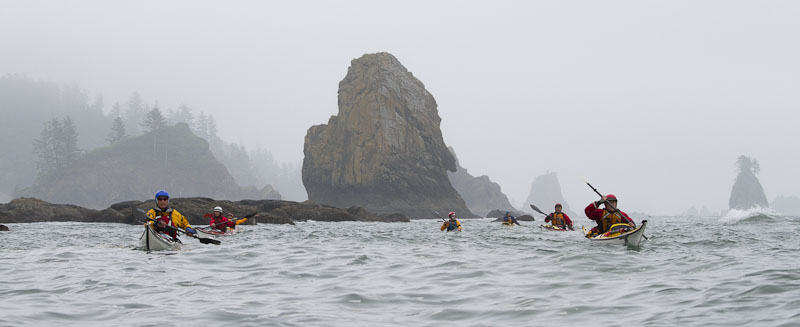
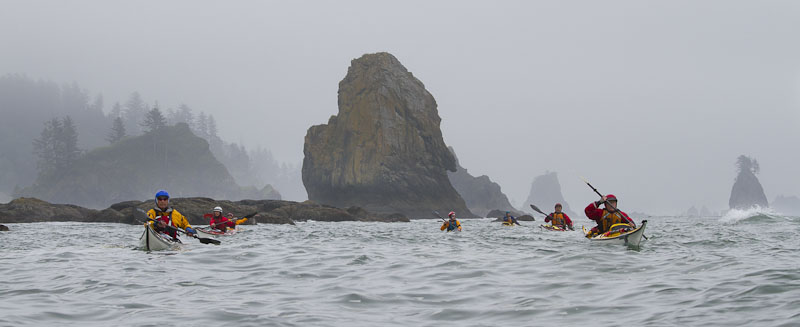
The gray sky photos at left demonstrate image improvement via the darkened sky. Using Lightroom 3, the first image shows how the gray sky looked on import with default settings. Working on a second, virtual copy (same image), I darkened the sky to -.68 stop after selecting the sky with the adjustment brush. I also added some vibrance to pop the kayakers a bit. I like the way the darker sky gives the scene a more threatening feel, and adds some mystery to accompany the background sea stacks.
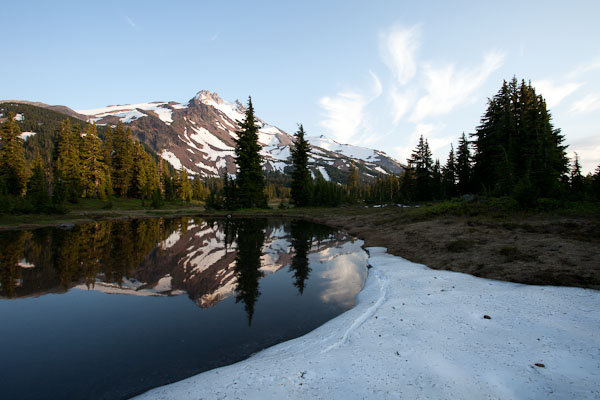
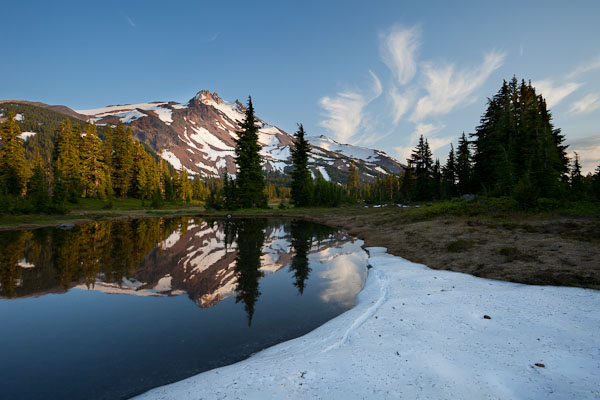
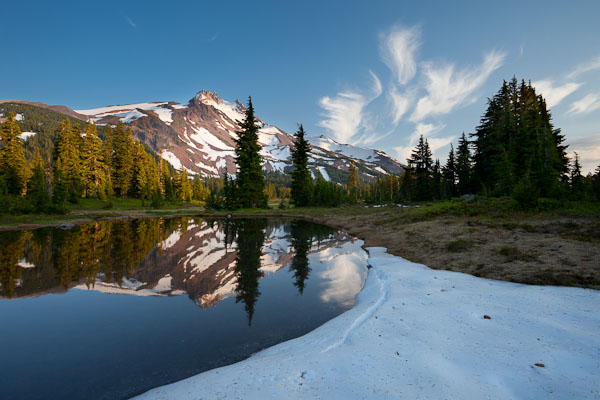
If you’re working on a blue sky, the same technique applies, but it’s possible to make an additional sky-darkening enhancement by controlling the luminance of the blues, on top of selectively darkening the sky. In this image of Mt. Jefferson in Oregon at Jeff Park, we again have a default image, this one with borderline whites that look blown. Here I again use the adjustment brush, selecting the sky and a bit of the mountain. I then slide the adjustment brush exposure down -1.4 stops, recovering the whites and darkening the selected sky (second image). (Remember we’re working on a RAW image here, and there is indeed some recovery on the white end. The whites are white, but no longer look blown.)
Going a step further, I scroll down to the color adjustments (HSL), set the pick to luminance, and pull the blue slider to a -40, dramatically darkening the blues in the whole image without influencing the other color (third image). I love the result.
Gary