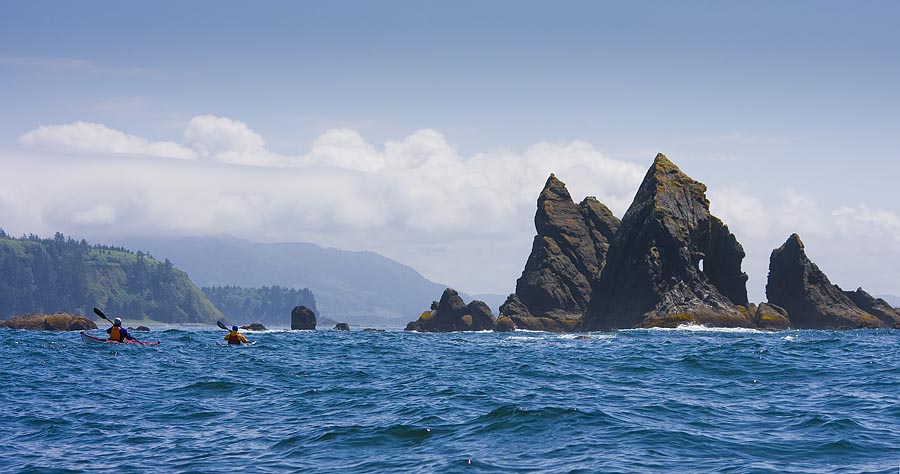
Edited 3/15/2013. Prior to Elements 6, on the rare occasion that I made panoramas, I stitched images manually. A big problem was that automated stitch programs produced banding in the sky, often accompanied by bizarrely-merged foregrounds. But when I saw a Mark Galer example (Adobe Photoshop Elements 6: Unleashing the hidden performance of Elements) demonstrating how seamless montages—even better than in CS3—can be achieved, I pulled some handheld photos for a test. The results were perfection: no telltale banding in the sky; no visible seam in the foreground.Panoramas are best begun with a tripod, with perfect results attainable by rotating the camera about the nodal point of the lens (usually toward the front of the lens in zooms) to avoid parallax. Here I’ve chosen a fairly easy example with just two images, but I’ve upped the ante by selecting handheld images created while bobbing in a kayak in ocean swell. So I not only wasn’t anchored to a spot, I probably drifted 20 or 30 feet between exposures.
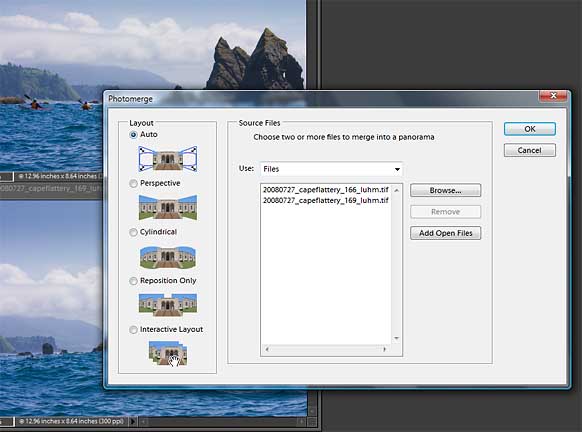
I got away with not being anchored because of an amorphous, distant foreground (the water) and a telephoto lens (70mm on a Canon 40d), but some things with panos are must-do’s. Shoot with the same (manually set) exposure, white-balance and focus, and process the images identically. If you’re shooting with a wide-angle lens—with a close-up foreground—use a tripod and center the lens at its nodal point (this usually involves some specialized gear). For telephoto images a tripod is useful, but—as in this example—they can be handheld, especially if there’s little foreground, and you can skip the specialized gear.To start the process in Elements 6, choose File>New>Photomerge Panorama (Fig.1). When the dialog box appears (Fig.2), pick Auto in the Layout box, select your images, click OK and go grab a coffee. If your file numbers and size are large it takes a while as the algorithm crunches all that data. For Layout alternatives to the Auto selection, the program offers Perspective, Cylindrical, Reposition Only and Interactive Layout. For many images the Auto selection works best, but if it doesn’t try the others, and as a last resort try the Interactive Layout to manually place images.Fig.3 Here’s the resulting image showing the masking on the layers palette. Image is ready for cropping.
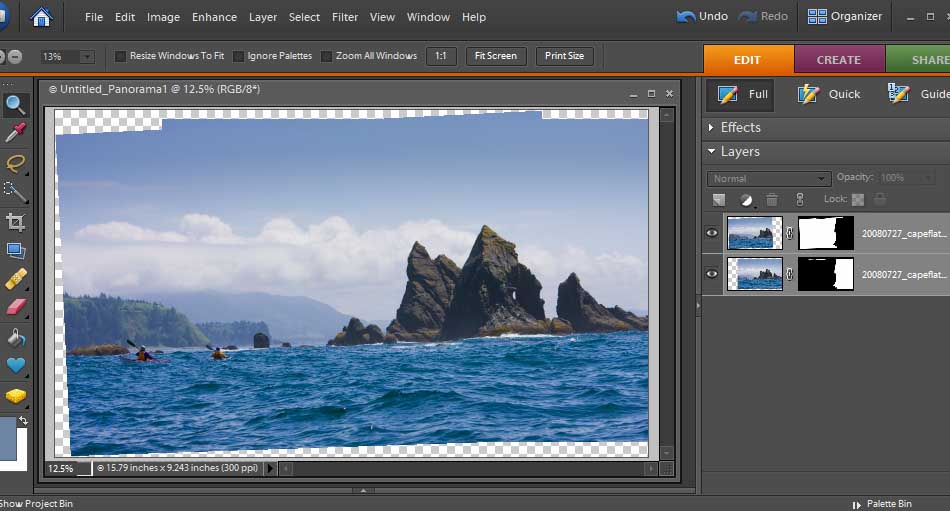
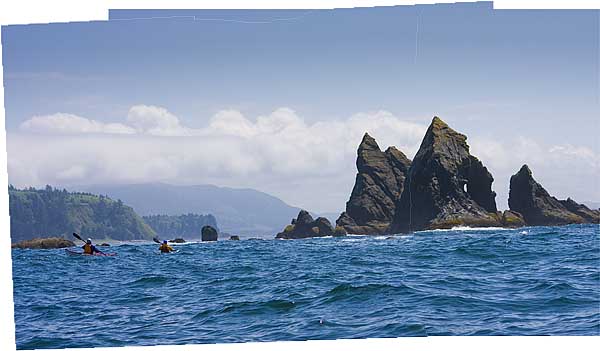
Fig. 3 shows the results, with masking shown in the Layers Pallet. One warning, if you downsize the image for .jpg export before you flatten the image, you’ll get a “cracked” image as shown in Fig. 4. No worries, just go back a step to the original size, and flatten the image beforehand. After cropping and horizon-line straightening, my final result was Fig. 5.
One final note: If you’re looking to produce mega-images from stitched files, Elements 6 (also thru Elements 10) cuts you off at a pixel width of 30,000 (that would be a 100-inch wide pano at 300 dpi!). For mural-sized panos, you could run up against this limit if you’re stitching, say, 10 horizontal images from a 4,368-pixel width Canon 5D. Incidentally, the Lightroom pixel limit is 10,000 (Lightroom 4 pixel width limit is 65,000).Gary