I had some fun shooting panoramas in August. Some worked out well and some didn’t; there were a few pleasing surprises. A successful pano requires not so much mastery of the technical aspects, easily done, but thought and imagination with composition that is especially demanding with rapidly changing light or with people on the move. Results can match or surpass the look and quality of a bulky, giant 6×17 panorama film camera (woo-hoo!!), with far greater flexibility (different sizes, shapes, lens, stitching algorithms, etc.). The 6×17 camera has one critical advantage: you can view the whole scene through interchangeable viewfinders and carefully make micro adjustments to the composition. For composing a digital pano, you really need to imagine it. Basic composition rules help a lot. The way is still full of surprises, all part of the fun.
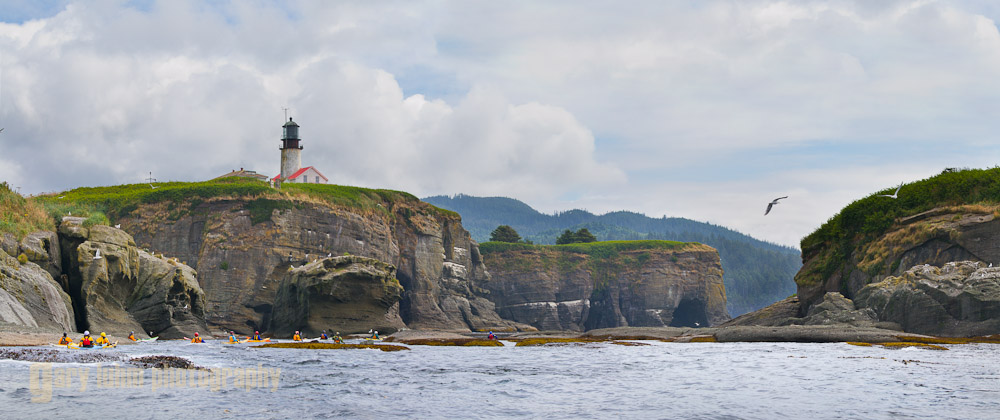
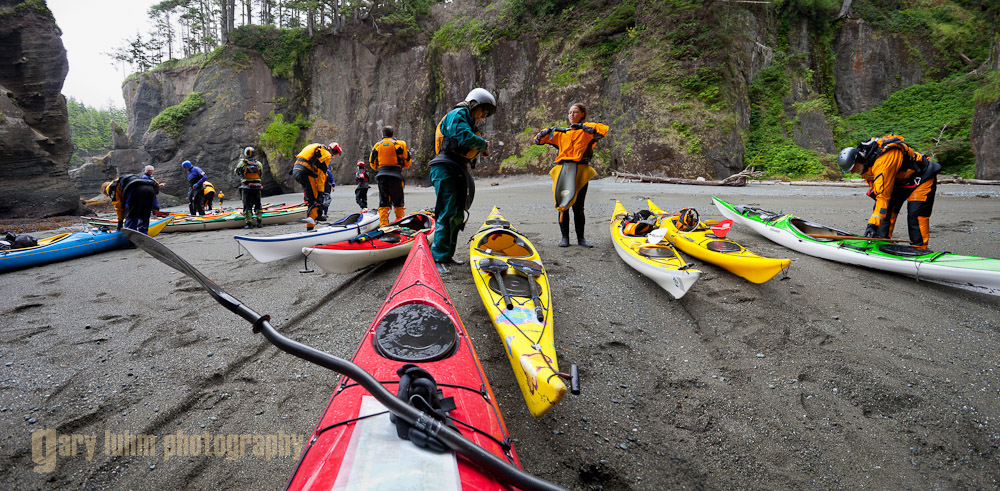
I covered the pano software of Elements 6 (newer versions are similar) and my personal hardware tools in prior tips. Here we’ll look at some fresh August, 2011 images to illustrate possibilities and composition. I stick with single row panoramas, and shoot from a leveled tripod with my pano tool when I can. Handhelds often succeed, however, even from a moving boat. My examples were all stitched with Adobe Elements 8.0 Photomerge Panorama.
If you have a recent model point-and-shoot digital camera, you probably have a great pano tool already in hand. Point-and-shoots often have a Panorama Mode or Stitch Mode, found in a screen menu or directly on the dial. These modes make panos easy by fixing the exposure with the first shot, and often showing a ghost prior image to get proper overlap and framing of the next shot in the sequence.
For dSLR shooters, it’s not quite so easy, but the quality images that result by following a few guidelines are astonishing. So first, a bit of review: Shoot in RAW, set exposure manually and level the tripod. If you have near foreground elements, get rid of parallax by rotating the camera around the lens entrance pupil (hardware needed). Beware of using a polarizing filter because of the uneven sky it creates. Forget multi-row unless you’re creating full-sphere panos for digital projections; shooting four to as many as a dozen verticals in a single row across a landscape produces files with plenty of pixels capable of giant, detailed prints. Overlap the images about 30%. Don’t point the camera up or down too much with a wide-angle lens, but if you do, increase the overlap. Be consistent by shooting left to right—left to right is easier to see on computer thumbnails, and may also save some confusion later on. It’s also a good idea to insert a blank (put your hand in front of the lens) to separate the image sets. Finally, try not to put complex elements or people on the seams—it’s best for the software to render these elements whole in a single frame.
For tough exposures, use a cable release and auto-exposure bracketing. I do a set or two of test exposures to determine the over and under amount and any exposure compensation. For example, I may find that a +2/3 works for the foreground, but -1-1/3 works for the sky, using Evaluative Metering (Canon). This means setting exposure compensation to -1/3, and bracketing to 1 stop. Later in Lightroom, I throw out the middle exposure, and then combine each pair of under/over (foreground/sky) in Adobe Photoshop before running the results through the Photomerge Panorama in the dropdown menu. (Note: many pros use split neutral-density filters for tackling tough exposures. I no longer use them because digital options have fewer limitations.)
Panorama Composition Tips:
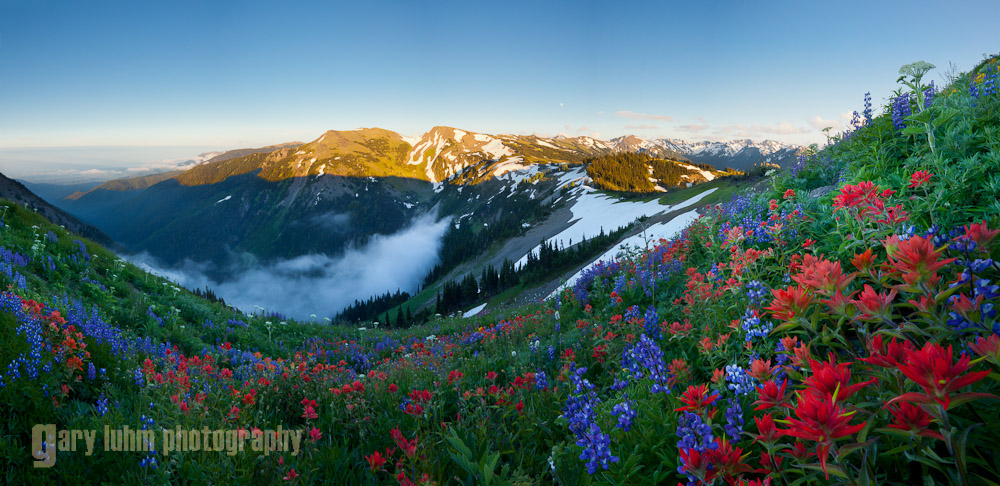
Panoramas need much the same graphical and element consideration as normal-shaped formats. Remember we’re taking a three-dimensional scene and reducing it to two. Foreground elements in a few places will add depth.
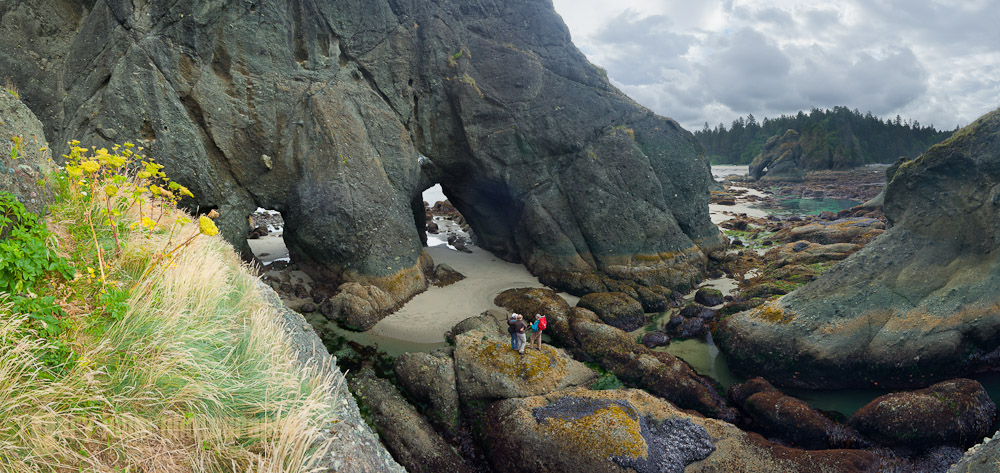
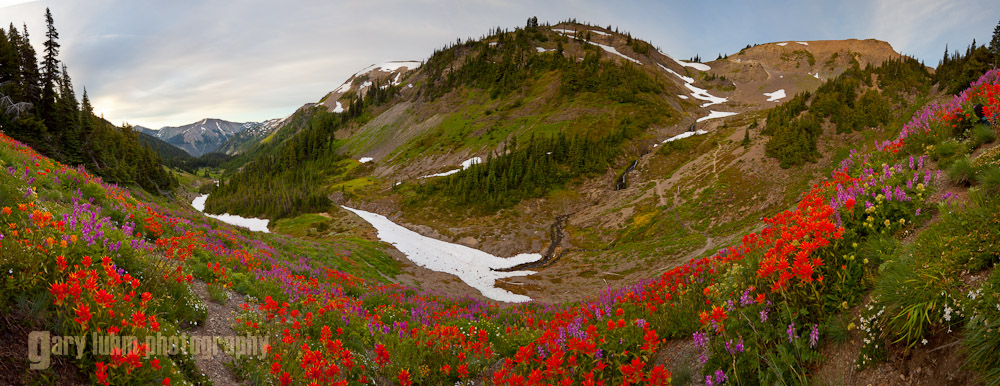
Frame the shot. Use a tree, rock face, foreground people, animal or flowers to lead the eye into the scene, and block the eye from leaving. Do it on both ends of the final image if you can.
Rule of thirds. Place a foreground subject or significant object a third of the way into the scene. A tree, for example, can neatly delineate separate subjects or space. Long panos will benefit from additional elements, like positioning a less dominant element at a 2/3’s point, for example.
Show an interesting sky; eliminate a gray sky. A sky with cirrus or cumulus clouds can really enhance the image, even count as the main subject. A stratus sky can deflate any image, particularly so in an unending panorama. If the sky is gray, narrow the field of view, maybe even going telephoto to completely get rid of the sky or reduce it to a small part of the overall scene.
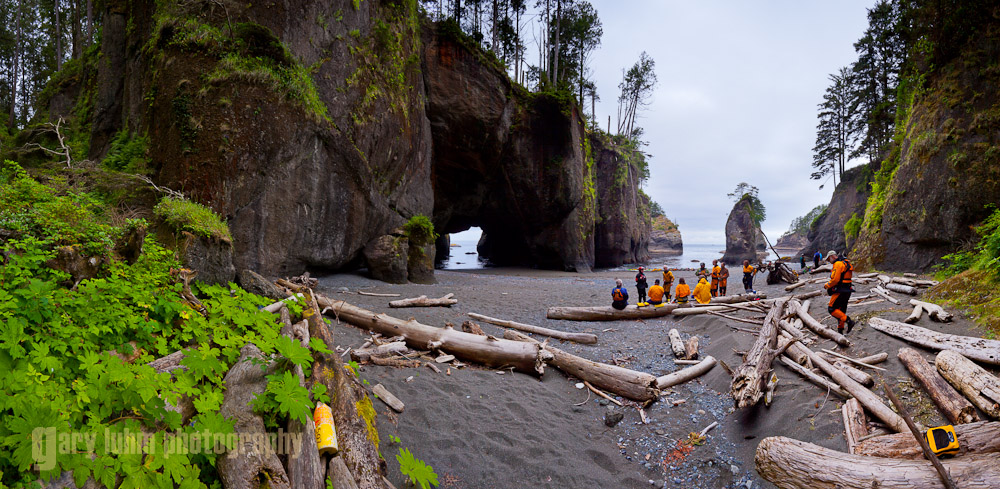
Use diagonal lines. Diagonal lines are dynamic. They create interest, they create movement and they lead the eye. A good example is a downed log that traverses more than one frame to add both dynamism and continuity.
Extend the foreground into the middle of the frame. Often when shooting on a hillside, we place foreground elements (framing) on the left and right, but it disappears in the center. Getting some foreground through to the middle, perhaps by setting up lower, with leading lines or with repetition of subject, creates interest, framing, a stronger image.
Can each frame stand alone? Finally, as you plan each frame, ask yourself whether each one can stand up on its own as a photograph. If you have more than one—or especially two in a row—where the answer is no, you’re likely to have a weak final image. Do this before you level your tripod and set the camera, and you’ll save yourself from producing a lot of marginal panoramas.
Gary