After hiking to Spray Park at Mt. Rainier NP (August, 2006), I shot a few frames to compare a graduated (split) neutral-density filter with achieving similar results in Photoshop. If you’re not familiar with split filters, they have darkened glass on half of their surface, to hold back the light, with clear glass on the other half. The neutral-density (ND) means it’s color neutral, though color split filters are also available. The edge between dark and clear can be abrupt, or “hard-edged” or a more gradual “soft-edged”. The best ones are retangular, and long enough so they can be slid up and down to precisely match the split between dark and light in the frame. I’ve carried two Singh-Ray brand split filters on kayak and backpack trips since 1996: a three-stop hard edge and a two-stop soft edge. These gems are not an accessory, they’re a necessity, needed because film (and digital) can’t handle the tonal range of light in many scenes without underexposing the dark areas, or, worse, blowing out the highlights. Until now.
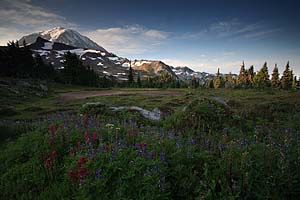
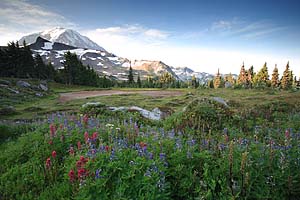
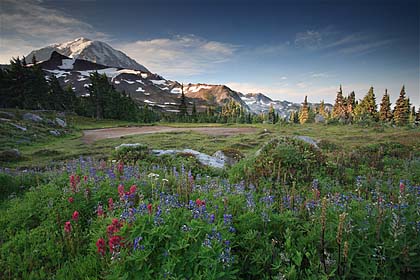
The scene pictured here is a good case for split-filter use: sunlit snow and a bright sky, foreground in shadow, and a fairly even line between dark and light. With the camera mounted on a tripod, my first exposure (above) got the foreground about right, but the in-camera histogram flashed the warning of blown highlights in sky and snow. I cranked back the exposure 1-1/2 stops for the second image, making the foreground dark. The histogram told me I captured the highlights. Then I went back to the original exposure, and carefully hand-held a three-stop split ND filter over the lens, moving it up and down until I was sure I had the bright areas covered. Getting this right takes some foreknowledge — or at least a check of the histogram — as a stopped-down lens will “move” the edge compared to the view seen wide open while composing. A check of the histogram showed I covered the highlights, with a bit of shadow area middle left lost to black (see image right).
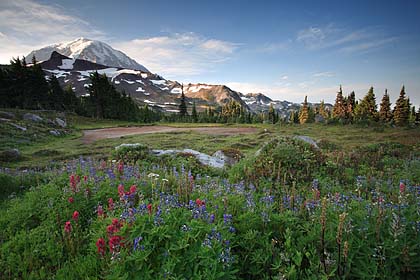
Photoshop offers a number of routes for merging two exposures. In Photoshop, select the Move tool (V), hold down the shift key and drag one photo onto the other to put the images on different layers in the same file. I put the dark photo over the light one. To select the light areas and sky, I used the Magic Wand and Lasso selection tools, adding area with the shift key and subtracting with the alt key (in Windows) until I had the sky and sunlit areas selected. The trickier part is getting a decent merge. In this case, I enlarged the selection by 50 pixels (from a 4368×2912 file), inversed the selection, feathered it 50 pixels, and cut it out. A little touch up with the eraser tool finished the work, about 15 minutes altogether.
Note that it’s best to do the erasing on an adjustment layer, so you can go back and correct any errors.
If you have Photoshop CS2 or HDRSoft’s PhotomatrixPro, a further refinement would be to take a series of exposures (three to seven) at one stop increments, and merge the photos using an automated method called high dynamic range (HDR). In CS2, chose Merge to HDR.
In this comparison, there isn’t a clear better image. The digital route is quicker in the field, with more detail in the blacks, at a cost of more work in the office. For backpack trips where ounces are important, I’ll likely leave my sacred split filters at home.
Gary