I upgraded to Adobe Lightroom 6 with some trepidation, after reading about and not being impressed by the new features. Adobe touted HDR and Panorama Merge especially, and my thought was “so what?” I’m no HDR fan, and for panoramas I get great results with Microsoft ICE. What I wish for in Lightroom is more control working on images — i.e. layers — and an Adjustment Brush that includes individual channel (HSL) control.
Anyway, on to HDR (High Dynamic Range), with Lightroom 6 (and CC) joining a crowded field of implementers hyping software that mixes multiple exposures of a scene to create a single, detail-rich image. I looked at last year’s files and selected a promising image set — a set with a high dynamic range requiring multiple exposures for a best rendering. I had developed it manually using layers in Photoshop, with pleasing results, so I had a high-bar comparison. How would the Ligthroom HDR implementation handle it?
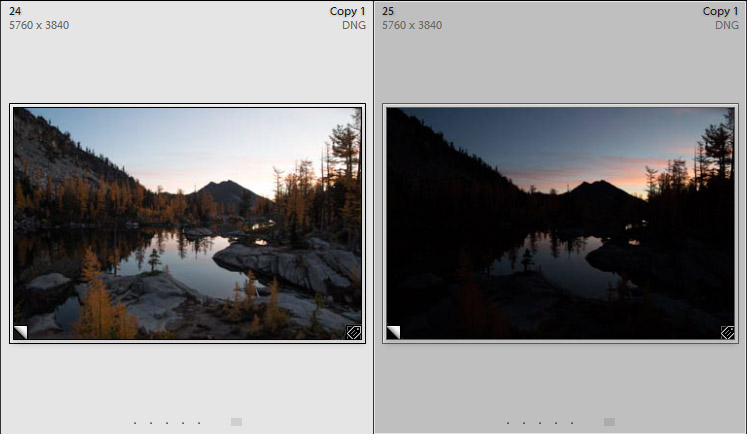
Creating an HDR in Lightroom is simple: I selected the three exposures — spanning three stops — then selected Photo Merge->HDR (or Ctrl-H) from the Photo pull-down menu. A dialog box popped up, with few options. I left Auto Align and Auto Tone checked, hit the Merge button, and waited. Soon a new, separate image appeared with a –HDR tacked on to differentiate it from the original files.
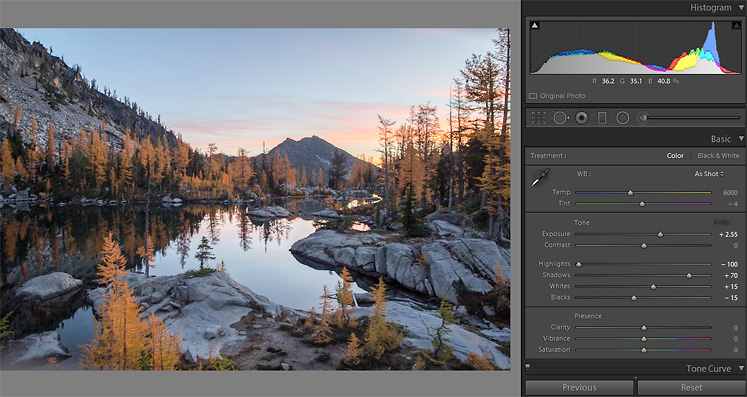
On inspection, the result didn’t inspire, but it had a realistic look, not too HDR, and with a look of actual, dare I say, potential? A look at the histogram told the story. The algorithm created a fairly even spread from lights to darks. Nice detail in shadow, but of course quite unlike the scene as I had witnessed it, and especially not how I artistically imagined it. Summarily, it was all robot, no maestro. Contained in the image, though, was the editing flexibility of RAW, perhaps just waiting for that imaginative, artistic touch. Looking at the (Auto Tone) choices Lightroom made in the Develop Basic Panel to create the HDR, what stood out was over-Exposure (+2.55) and Hightlights (-100). Over-exposure, especially, sucked out the artistry.
Since my vision was a darker, more mysterious image, I brought the exposure down (to +1.22), and added some saturation punch (+24). Then I did some dodging with the Adjustment Brush, to lead the eye and further knock down highlights. Quick work — and considering the start-to-finish effort — productive time indeed.
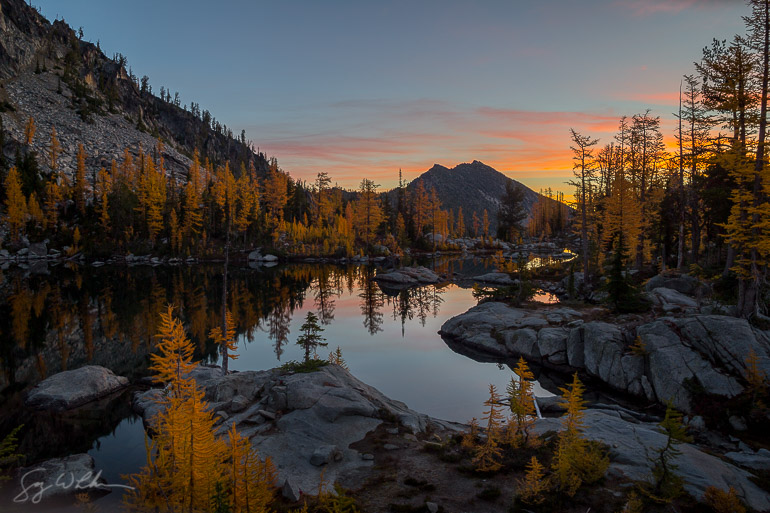
My modified HDR, looking pretty good above, still didn’t match my vision. For that I needed Photoshop; I needed layers. And I conclude that for many images, Lightroom HDR is only a start.
In this particular case, I wanted to alter the hue and luminance of the yellow larch without losing the sunrise, something I can’t do selectively with Lightroom 6 tools. So I exported two different HDR versions to Photoshop and combined them in layers. Since I already had my all-manual creation from two exposures, I’ve posted a comparison of both below.
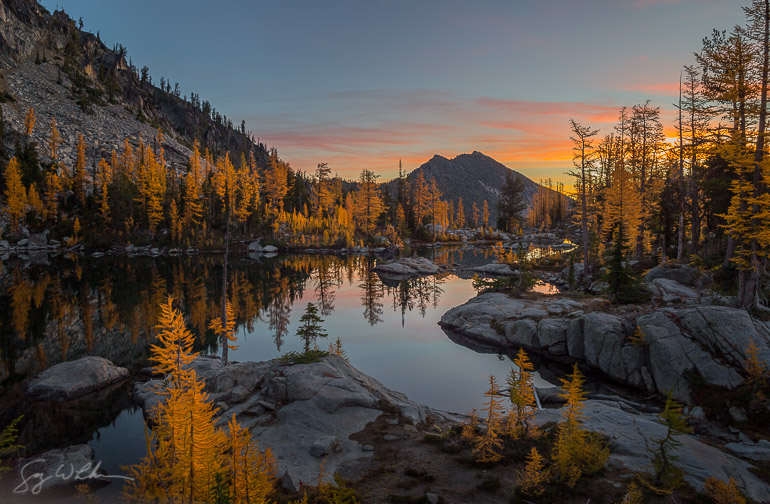

Both the manual and the HDR layered images are similar; they match my vision. I like both of them far better than the optimized Lightroom-only HDR. But I see the usefulness of Lightroom HDR. It’s fast. HDR with RAW files underneath may be a quick, satisfactory step to an optimum image, often without leaving Lightroom. Additionally, sets of HDR’s can be used to create RAW Panoramas with minimal effort, just a bit of tweaking after creation. Yeah! I started out thinking Lightroom HDR was not useful; now, I’m over the moon.
I like the merging additions, and the new facial recognition does help a bit for organizing, but you would think Adobe would have increased the photo-manipulation a bit more for the price of the upgrade. At least a more precise cloning tool or healing tool like Photoshop CS6.
Nice review and glad to have you back!
Sorry it took so long to reply. Thanks for the post!