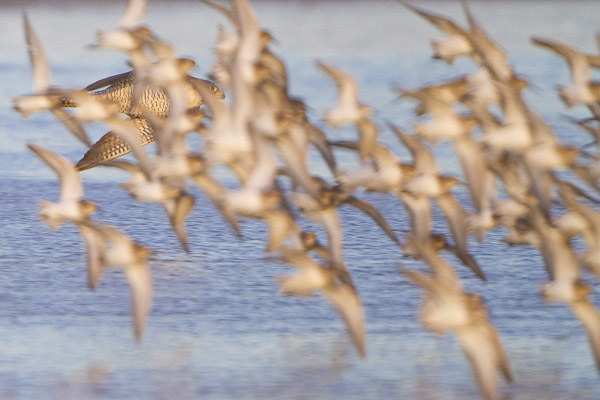
I bought a Canon 7D in December, and have used it for some tough bird in flight (BIF) shooting, as well as for perched but flighty songbirds. My hope for the 7D was that I finally had a camera that could nail a high percentage of BIF shots, images that my primary camera, the Canon 5D Mark II, had difficulty. The 7D does indeed have faster auto-focus than the 5D on all points, and that combined with the dense pixel array (18MP on a 1.6x sensor) and 8 frames/sec shutter speed make it a formidable BIF shooter. At the same time, the 1.6x crop factor and the dense pixel array make exacting field technique all the more important for sharp images. With the 7D, I’m getting on the bird faster, and I’m getting focus on some tougher shots like BIF moving toward or away at oblique angles (straight on, especially accelerating birds are still a problem, although most of the time it’s still operator error for these tough shots). My percentage of keepers overall has marginally improved, and I am going after tougher shots.The 7D offers a number of autofocus controls, some not seen before even on Canon pro bodies until the Canon 1D Mark IV. The default settings serve pretty well for most shooting; be warned that optimizing the camera for one circumstance may be detrimental to another. I like the autofocus (Custom Function III) control options—it compels you think about what you’re doing. It also makes you realize the limitations in a “one size fits all” focus set-up. Accurate, consistent auto-focus imposes huge demands on a control system.
Canon’s published explanation of 7D autofocus barely scratches the surface—and left me scratching my head—but the camera’s autofocus tracking (AI Servo II AF focus tracking system) is much like the Canon 1D Mark IV, which has an excellent AI Servo Custom Function Guide. I gained a lot of insight reading it; 7D shooters would do well to examine it closely.
Before we get into the AI Servo Custom Functions for optimizing BIF, there’s a few other helpful set-up options on the 7D. First I would suggest photographing in manual exposure mode unless the light is changing sporadically, as it might on a partly-cloudy day. Set up in RAW, shoot in Continuous drive mode, and of course shoot in AI Servo (AF mode) focus. If your telephoto has a distance limit switch, set it appropriately to reduce hunting.
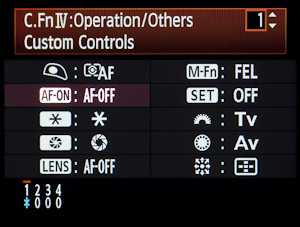
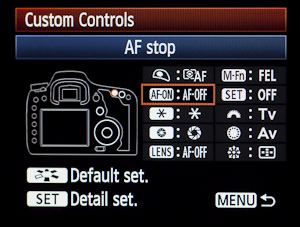
AI Servo is a predictive mode that keeps the focus changing with the moving subject. In contrast is ONE-SHOT mode, where you use the shutter button to acquire focus and then focus stops, great for stationary-subject re-composing (Hold down the shutter half-way to focus, re-compose, and then capture). In AI Servo the lens will keep on focusing with the shutter button pressed half-way, whether or not you stay on the subject, and, importantly, as you press the shutter it will continue to track focus as it predicts where the subject will be at the instant of capture. To address the re-compose limitation in AI Servo—i.e. to add a ONE-SHOT feature—I’ve reset the AF-ON button (one of many Custom Function IV-1 options) to stop autofocus (AF OFF). Now after acquiring focus, a press of the AF-ON button holds the focus to re-compose and capture, just like ONE-SHOT.
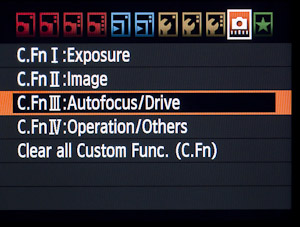
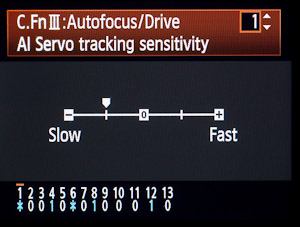
The bulk of the Autofocus Drive options are in Custom Function III in the camera menus. Understanding what each one does allows you to effectively modify the settings to fit the situation, helping produce more “keepers”.
Custom Function III-1. AI Servo Tracking Sensitivity. This determines how quick the focus responds when a large distance change is detected, such as a tree crossing the foreground while panning a bird, or if you momentarily lose the subject and the focus point is suddenly on the background. A Slow setting (1 or 2) delays the switch to the new focus distance; fast (4 or 5) gets on it immediately. I like slow for ducks, geese, larger raptors; the (2) setting captures most of that best. I like fast (5) for frenetic kinglets and chickadees.
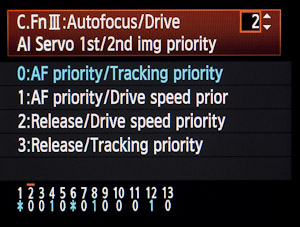
Custom Function III-2. AI Servo 1st/2nd img priority. There are four options here when holding down the shutter for continuous shooting. The question is: Do you want focus or speed with the first image captured? Do you want focus (tracking) or speed on subsequent images? For BIF, I’m willing to wait to acquire focus in both cases, because I think the predictive AI has a better chance of getting a sharp eye. Especially I think this is true with subsequent images, so I go with the default, (0). In either case it’s tough for AI to react to a quick change, for example when a bird leaps off its perch and flies toward you or on some oblique angle. If you can react quickly enough—I know I can’t—you might go with (3), get a shot first and then track. If your pre-focus is accurate you may get a higher percentage of first-shot keepers that way.
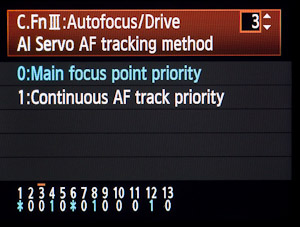
Custom Function III-3. AI Servo AF tracking method. I believe this only applies when multiple focus points are in play, not single-point or spot, but including single-point plus expansion. When tracking a subject, the (0) setting switches to a foreground subject if it, say, intrudes from the side, as when one bird flies in front of another across the main focus point. The (1) setting sticks with the original subject by switching the focus point to another active point that is still covering the subject. I don’t often use expanded points, but when I do I favor (0). Picture two ducks in flight: you focus on the lead bird, but a second, closer bird overtakes it. Most likely you’d want to swap focus to the foreground bird.
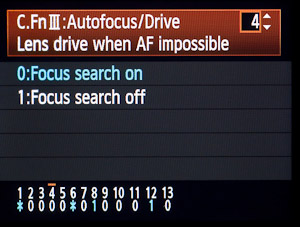
Custom Function III-4. Lens drive when autofocus is impossible. Sometimes when the subject is wildly out of focus (OOF), a camera can’t find it, and the bigger the telephoto, the more likely this is. For the wildly OOF subject, the default (0) setting will go hunting for it, focusing in or out until it finds focus. Since this takes time, with the lens potentially going on a time-comsuming chase for focus, option (1) stops focus, which means you must re-find it manually, bump/ try again (which often fails), or focus on something other than the subject, and then sort of coax it in. I used the stop (1) setting for a while. It works if you know the approximate distance of your subject, and pre-focus. For BIF, guess the bird’s flight path, focus on something close to that distance, and—when the bird flies—hit the focus when you’ve got the bird on the point. For setting (1) to work, you need to be vigilant. I’ve switched back to the default (0). I still pre-focus, but now if I lose it, I’ve found it gets focus back faster by hunting for it. I find this especially useful shooting hand-held, where you’d need a third hand to easily focus manually with a 500mm f/4 (and this is often my situation in a kayak). When on a tripod, it’s easier to manually get the focus close, and then bump the focus to accurately acquire it, so that’s when a stop (1) option may make some sense.
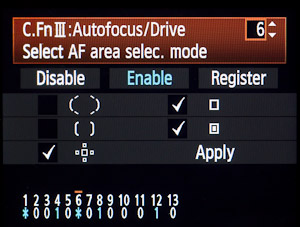
Custom Function III-6. Select AF area selec mode. The 7D has 19 AF points, all cross-sensors. The center point has additional diagonal sensors that work with f/2.8 and faster lenses. This C.Fn allows you to select from a menu of focus point and area selections. There are five options: All (auto), Zone, Point, Spot and Point w/Expansion. In general, I like going with a single point, and I like the center point best. I think a single point is faster than multiple points, and the center point is both more accurate and faster than the others, and not just with f/2.8 lenses (There does not seem to be the huge difference in focus performance between center and other points on the 7D compared to the difference between center point and surrounding points on the 5D/5D II or 40D. As shown on the screenshot, I’ve un-checked All and Zone. I think All and Zone are slower, and will initiate focus with an incorrect foreground element if given the chance. Single point w/expansion may work if you have trouble staying on the bird (Jim Neiger says don’t use it for busy backgrounds). Spot is excellent for small birds flitting about in the bush, both for nailing the focus on the eye, and for avoiding focus on interfering foreground branches.Gary
Thanks for the article. Very nice clear explanations with example – exactly what is needed 🙂