
When shooting wildflower or floral portraits — pictures of single flowers or small groups of flowers — it’s often difficult to achieve both sharpness in the flower(s) and pleasing, poster-like, out-of-focus backgrounds. In the past I ususally went for the pleasing background, picking the most important floral part, like the stigma or edge of a pedal, for sharp focus. Digital photography, plus Photoshop, allows you to get both with the following technique.
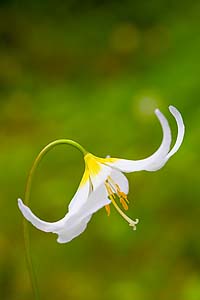
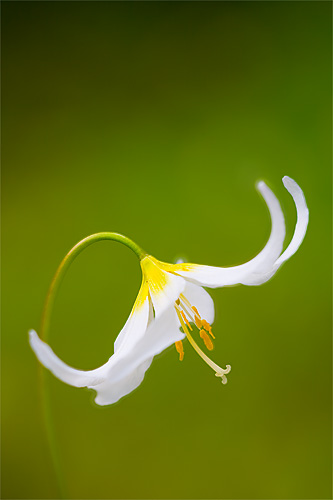
The first Avalanche Lily photo, left, at Mowich Lake, Mt. Rainier NP, was shot wide open at f/2.8 with the Canon 90mm T/S lens. A 25mm extension tube was used to get closer. Note the pleasing background. I focused on the stigma and stamens, which are mostly sharp. Much of the petals, stem, etc. are well out of focus owing to the narrow depth-of-field. I especially like the way the base of the stem disappears. The second image, right, was shot at f/8, rendering most of the flower in focus, but with the background picking up a mottled, busy, aspect, with the whole stem in sharp focus. For the best of both images, they can be fairly easily combined in Photoshop (I used Elements 3.0), or some other photo manipulation software. Also note, a solidly-anchored tripod is pretty much mandatory. You want both images to be in the same “register” once in-camera, to save headaches later on.
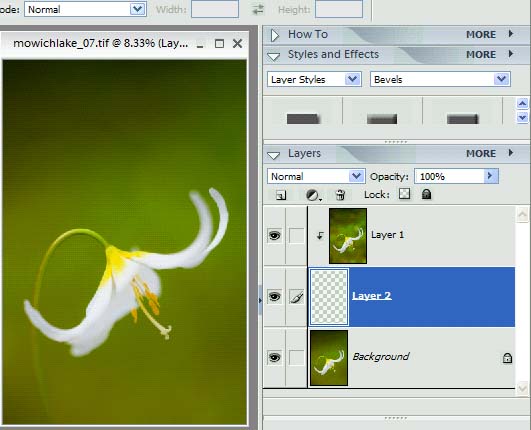
Back in the office, bring in both images into Photoshop. Select the f/8 photo by clicking on it. Then, for Windows users, hit Cntl A to select all, and Cntl C to copy to clipboard. Select the f/2.8 photo and hit Cntl V. This puts the f/8 (Layer 1) photo directly on top. Go over to the layers panel (on the lower right), and click on background to select it. Just above Layer 1 is a row of icons for creating a layer, creating an adjustment layer, and a trash can. Click on “create new layer”. Now click on Layer 1, and then hit Cntl G, which groups Layer 1 with the new blank layer (Layer 2) below. The f/2.8 layer now shows. Click on Layer 2, and we get to the screen shot at left. Note the down arrow on Layer 1 that shows it’s grouped with Layer 2.
Now the only difficult part. I clicked on the top layer, and then used the Magic Wand Tool set for a tolerance of 70 to select the petals and flower parts, plus a bit of the stem. The Lasso Tool added a few bits that I missed. I then contracted the selection 5 pixels, feathered it, selected the adjustment layer, and brushed in the selection. As I did this, the sharp areas of the flower from the Layer 1 “f/8” image appeared. As it turned out, a few petal edges didn’t “work”, areas where the sharp and soft images didn’t feather well, but no matter. I alternately used the Eraser Tool and the Brush Tool on the adjustment layer to work these edges, until I had the “look” I wanted.
You’re probably best off saving the work as a PSD or TIFF with the layers intact, in case you want to return again to the image and improve on your handiwork.
Gary