I had an excellent photo op last spring: a flicker nest only fifteen feet above the ground, with a clear view, and just two miles from home. Because I was wary of disturbing the skittish birds, I photographed just a few times, in good light only, for periods no longer than an hour. Each visit I got two or three fly-ins.
The photo op was near perfect. Only the background was a bit flawed, since wherever I positioned, tree branches or foliage cluttered the scene. I resolved to do clean-up in post.
In general, I do all reasonable image clean-up in Lightroom 4. I’m comfortable with Lightroom. My images are imported and organized there. I prefer a single RAW file with a recipe to a RAW file plus a much bigger PSD or TIFF.
For image clean-up, I use the Spot Removal tool for much more than spots. If it saves me a trip to Photoshop—even when Photoshop can do more exacting work—I try Lightroom first. If the repair work fails, Photoshop gets the call.
A flicker image illustrates the task.
Getting ready for Spot Removal
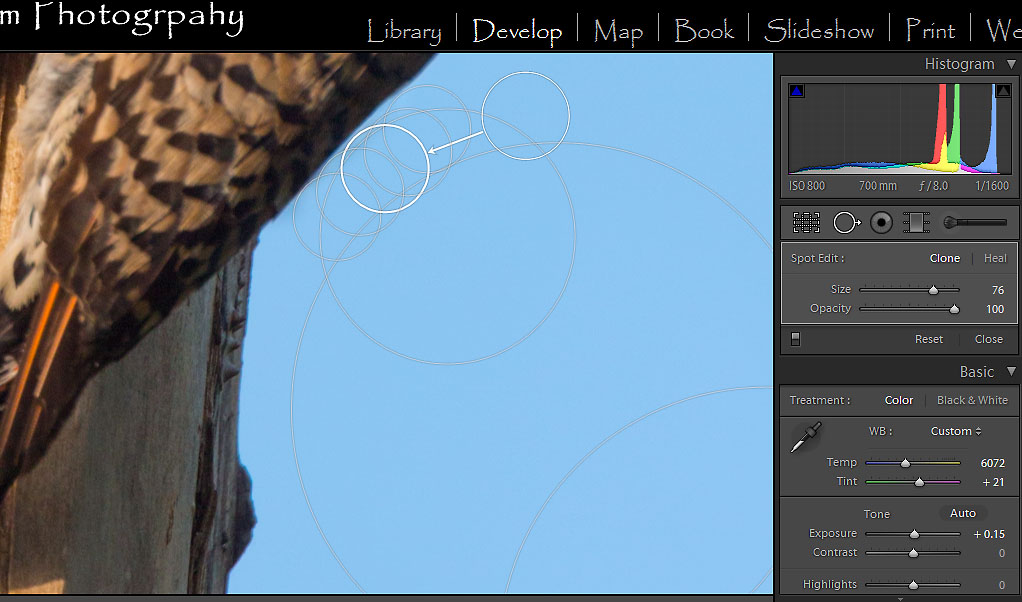
After importing the RAW file into Lightroom 4, I warmed the image with the temperature slider, and added saturation, shadow detail and a 3:4 crop. I also lowered the blue luminance in the HSL panel, since the sky was a pale blue (Image 1). The remaining work was all Spot Removal.
In the Development Module (D), the Spot Removal tool is located under the Histogram between the Crop Overlay (R) and Red Eye Correction. Left click on it to select it, or use the keystroke (Q). Selecting the Spot Removal tool opens the Brush/Spot Edit Box. Inside the Box is a choice between Clone and Heal, a Size slider and an Opacity slider (Image 2).
Spot Removal works its magic when you place the target (bold circle with + inside) on the offending area and then choose a source material (second circle) for the repair.
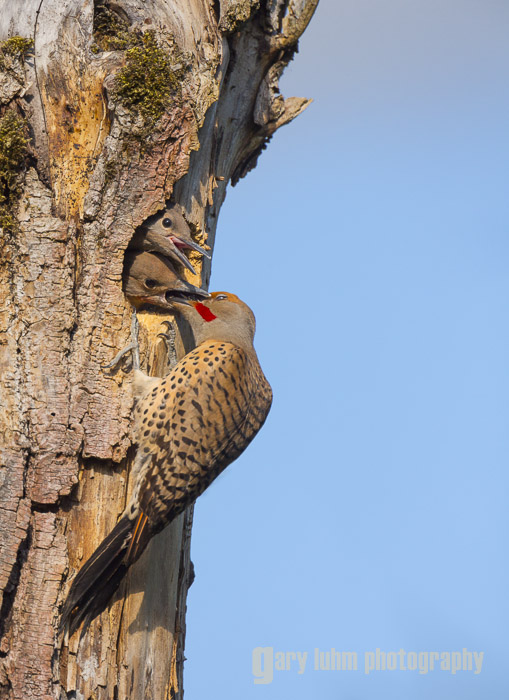
![Image 2. Here I've selected the Spot Removal tool (Q), resized it using the bracket keys [], selected Heal from the Spot Edit box, clicked on the first spot (removing the dust spot), and](http://garyluhm.net/blog/wp-content/uploads/2013/03/spotremoval1.jpg)
Clone feathers in an exact copy of the source material. Heal uses the source for texture, but retains the target material color/tone/brightness. With Heal, I can take a plain sky sample that may be too light-colored for the target, but the target pixels determine the tone so I get a good match.
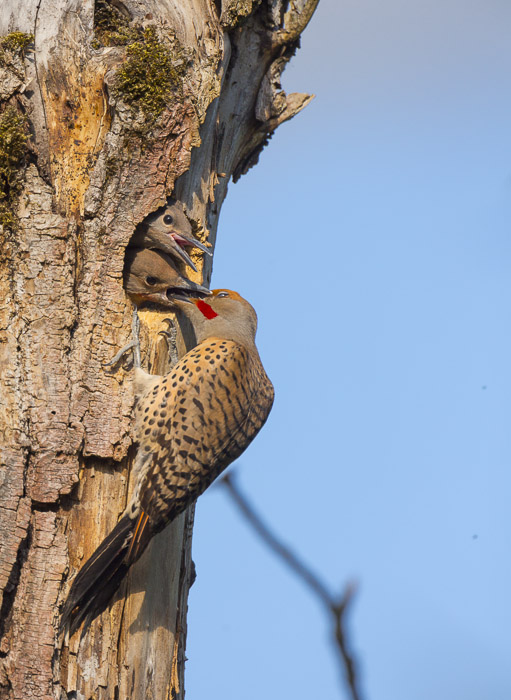
I start with Heal for dust spotting, but sometimes Heal fails. For spots near edges, or for removing long, thin shapes, Heal often causes bleeding (see Image 3); then Clone is a better choice. Whichever you choose, you can click from one to the other, so you’ll quickly see which works best.
Adjust Size
Once the Spot Removal tool is activated (Q), bring the cursor over the area that needs work. Use the bracket keys, left [ for smaller, right ] for larger, to adjust the circle size. You can also use the Size slider inside the Box, or the mouse scroll wheel, to adjust Size.
![Image 3. Using the bracket keys [], I resize the Spot Removal tool and begin branch removal using Heal by clicking on a lower part of the branch. As you can see by the smeary (bleeding) blue-gray inside the circle, Heal didn't work very well. Again, use the (H) key to toggle the Spot Removal circles on and off, to better see your results.](http://garyluhm.net/blog/wp-content/uploads/2013/03/spotremoval2.jpg)
Unfortunately, the Spot Removal tool is limited to circles—no ellipses, no rectangles, no complex shapes. Sometimes you just need Photoshop.
Apply the Tool
There a couple ways to apply the tool. Once the size is chosen, hover over the target and (left) click on it. The tool then determines the source material—sometimes smartly, sometimes not so well. Alternately, click but hold down the (left) mouse button. This allows you to choose the source—just release when you reach it. Either way, if you don’t like the results, click while hovering (a hand appears) over the source (or target) circle, and drag it to a new location. You’ll find you may move the source (or target) multiple times to get it right.
When you move on to create another spot, notice that prior spots are visible but de-activated. Active spots have a brighter target circle. You can re-activate any previous spot by hovering over it and clicking.
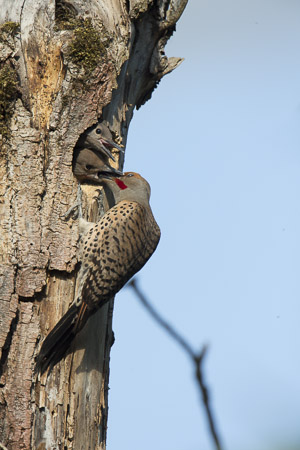
![Image 4. Here I've made the Tool even bigger using the bracket keys [] and switched to Clone in the Spot Edit box. I used Clone three times to disappear most of the offending branch.](http://garyluhm.net/blog/wp-content/uploads/2013/03/spotremoval3.jpg)
Check your work
To check your work, hit the (H) key to hide the circles. You really can’t tell if the job is done well until the circles disappear. Be careful with the (H), though. Lightroom remembers the H toggle, and you can get confused if you enter Spot Removal mode expecting to see circles and see none. Toggle (H) and they appear.
In the lower left corner of the work area you’ll find Tool Overlay (tool show or no show) options: Auto, Always, Selected, Never. Leave it on Auto. Toggling (H) switches the Overlay between Auto and Never.
To delete a Spot, click on it to activate, and hit the Backspace or Delete key.
Also in the Box is an Opacity slider. I’ve used it mostly for de-emphasizing or softening backgrounds. Softening wrinkles in a portrait would be a good use as well.
Press the (Q) key again to exit Spot Removal.