
For many of us, shooting verticals takes a conscious effort. The comfortable grip of most cameras—especially most dSLR’s—induces “landscape” shots. Only high-end dSLR’s have a built-in vertical grip that helps make “portrait” shooting routine. Still, rotating the camera 90° involves either a thought like “I should get this in a vertical for its cover potential”; or a compositional decision, “this will look better as a vertical”. Mostly we happily fire away shooting horizontals. Then we end up after the fact thinking, “Dang, if I’d only shot that as a vertical”.I have a vertical grip for my Canon 5D, but for reasons of bulk or stowage (or forgetfulness) I usually don’t carry it. I also hand-hold a good deal of my photography, and I’ve found that shooting a vertical by turning the camera (and thereby lifting the right forearm skyward) has a steadiness penalty. Even when shooting in sunny skies and bright light, I get a higher percentage of hand-held keepers shooting horizontals. So unless I’m on a tripod with a collar to rotate the lens (or a Wimberley-type head), I actually prefer shooting in “landscape”.
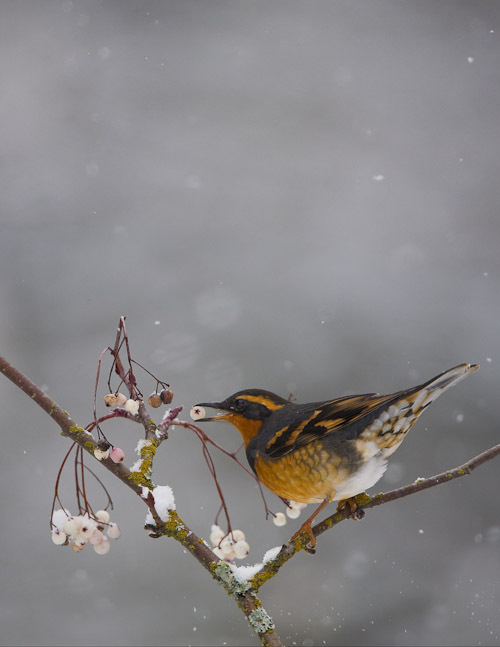
So here’s a tip. After you fire off a series of horizontals that have you jumping for joy, point the camera above the scene and shoot one more, with a 25% overlap. Do this routinely, and you’re potentially doubling the market for the image. In Photoshop, combine the “above” image with your “best” horizontal. You’ll then have a portrait format image with space at the top for a cover title, name or logo.
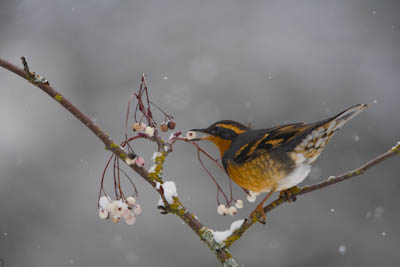
The Varied Thrush feeding on Mountain Ash berries illustrates. I banged off a number of horizontal images, but then the thrush moved on to other pickings. I didn’t get any verticals. No worries, though, because I remembered to shoot an “above” shot. I aimed the camera just above the place the thrush left, and clicked the shutter. For this to work, I used the same shutter speed and focal length, and didn’t re-focus. If you’re shooting in manual mode already this is easy. Just turn off the on-camera focus button, aim high and shoot. Or, push the shutter half-way (in one-shot mode) to focus on the branch the subject was perched on, re-compose, and take the shot. You’re looking for an out-of-focus background that will merge seamlessly with your “best” image. If you’re shooting in aperture priority, try to match the exposure anyway, it makes things easier later on. It’s also helpful to shoot in Raw.
Back on the computer, I made some ordinary Lightroom adjustments on the “best” image, synced it with the “above” shot to make sure they matched, then exported both to Photoshop Elements 6. I won’t go into the Photoshop technique here, but for most images, merging the overlapping, mostly out-of-focus areas is quick work.
A sharp eye may notice a few other differences with the finished vertical compared to the original. The bird’s bill no longer touches a twig, and the bottom of the frame has been expanded a bit. I fixed (lowered) the twig by replacing it with one from another photo, splicing it in and even rotating it a bit until it looked right. The extra space at the bottom came from another photo as well, and gives the bird more room from the bottom of the frame. What can you say, but “Aah, digital”.
Gary