Out on a woods walk one spring, I observed a pair of chickadees holing out a nest in a snag. Significantly, it was five feet off the ground, an eye-level dream that sent my photo-obsessed brain a-buzzing. Would they nest at that elevation in my backyard? What potential! The following spring I tested the idea.
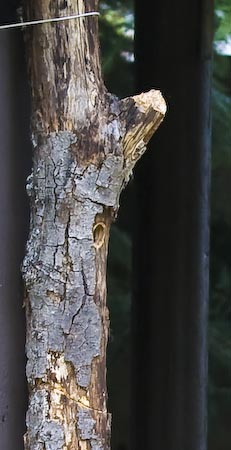
After a winter storm blew through, I collected a few downed 5-6” diameter alder logs from a nearby woods and set them to dry under the house. Then, with buds popping in the approaching spring, I picked out a log, sawed it in two with a couple of angled cuts, hollowed out a 4” diameter, 10” deep, interior, and drilled a 1” entrance hole near the top. I joined the log together again with 3” wood screws, and fastened the log to a backyard post with a couple loops of rope. It was early April, and a couple days — if not hours — later, a pair of Chestnut-backed Chickadees moved in!! They brought in moss for a nest, and aggressively drove other chickadees from the yard. In our trim suburban neighborhood, this real estate was clearly dear.
A week into May, the chicks hatched. The parents went frenetic, flying in with larvae and insects at three- to six-minute intervals all day long. Their routine was to land on the same tree branch ten feet from the nest, look-look-look as chickadees do, and then swoop down and zip through the hole. Translation: flight shots on a predictable trajectory! On a free morning, I readied my 500mm f/4 on a tripod. For flash, I set up two Canon 430ex’s as slaves, controlled by an on-camera 580ex. Exposure was set manually on my 5D, varing from f/5.6 to f/11, 1/2000-1/5000sec, ISO 800-1600. The flashes were set to high-speed sync. I focused manually at the entrance.
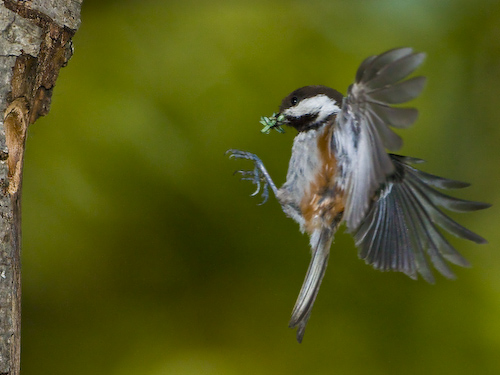
For the flight shots, I never looked through the viewfinder. I concentrated on a chickadee when it landed on the branch, and pushed the shutter in a sort of timing pattern as it launched for the hole. I could get one shot off per launch. Holding down the shutter for a burst didn’t work because of the speed of the bird, but then the flash would fail after the first shot anyway (Note: I don’t have battery packs like the the Canon CP-E3 or E4 — which would probably allow several flash shots before recharge, but in any case they don’t work with the 430ex, only the 580ex, 550ex, 540ex and 430ez). My success rate was (superficially) dismal: many blank frames, many shots of a bird half-disappeared down the hole. I got a bird in flight on maybe 15%, and most of those were throw-aways due to poor composition or an un-sharp eye. But then, the goal is one good shot, nicht whar?
I left for Alaska on May 13th, so I only photographed the Chestnut-backed’s twice, probably four hours total. I only used high-speed sync for flash. When I returned home the chicks had fledged. In any case, I love this concept: low-cost, high-yield photography that keeps the gas-guzzler parked, with time spent on a challenging subject.
Update, 3/3/2013. The last few years I’ve always had at least three species nesting in three or four home-made alder houses, including Chestnut-backed and Black-capped Chickadees, Bewick Wrens and Red-brested Nuthatch. I needed a blind to photograph the Wrens, but the Nuthatches are so tame I could stand a few feet from their house and they continue to fly in and out. I’ve generally given up on flash; I find to too un-natural. If I need extra light I bounce sunlight in with reflectors, and shoot with high ISO’s.
Gary