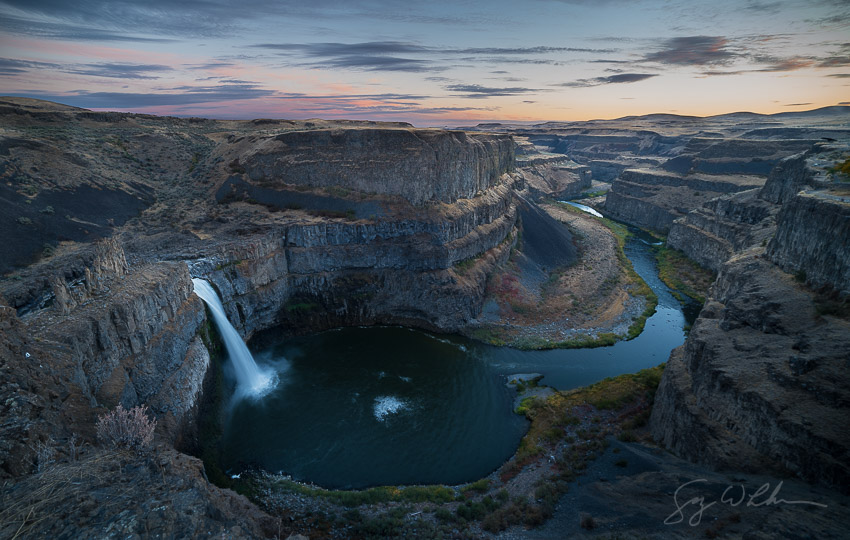
Two exposure sunset, created from Merge HDR in Lightroom.Everything was going according to plan. At home, I consulted with www.stellarium.org for the Milky Way location, NOAA for cloud cover and Google Earth for orientation at Palouse Falls, WA. An October Milky Way shoot looked probable. I also checked the Palouse River stream gage, which was flowing above normal, not high but good enough. A 5 hour drive from Seattle and we arrived with time to scout the precarious, cliff-side location in daylight. I found several spots where the deep canyon and river form parallel curved lines that lead the eye. We could place the falls to the left, canyon right, and Milky Way arching upward above it all. Lens choice would be the widest in our arsenal. Return after sunset for the shot.
Then clouds got in the way.
At dusk, scattered puffs pinked up the sunset, but before we reached the finish of astronomical twilight, clouds blocked chunks of the Milky Way heart. We quit shooting. Walking back to camp, I thought the session a bust.
Shooting Palouse Falls is a breath-taking experience, and not just the scenery. The left-to-right, falls-to-canyon view delights the eye. Subtle variations from a series of view-points yield numerous options. The shots demands a tripod, and a wide-angle lens of at least 16mm full-frame. Perched on the cliff edge, the shot has a risk factor as well, made more-so in darkness.
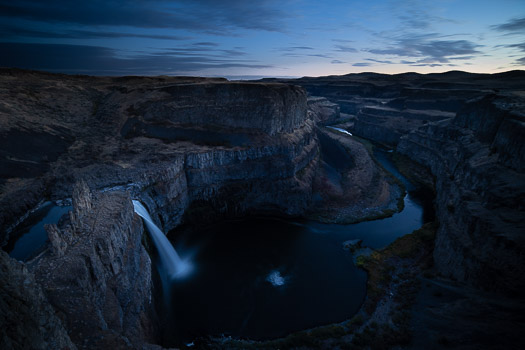
Canyon shot before it got too dark. ISO 800, 30 sec, f4.A key to a night shot here, as with many locations, is to grab a foreground image shortly after dusk when there’s still enough light for low-noise and for preservation of dynamic range. At twilight’s end, it’s black down there. One plan is for a simple HDR combination: one shot for the canyon, one for the sky, in the same register. To get the full heart of the Milky Way as well, the upward expanded field-of-view from the cliff edge requires additional image(s) for constructing a vertical panorama in post.
Back home, I created a sunset shot with two exposures, combining them with the Merge HDR tool in Lightroom. After a bit of dodging and burning the sunset image was done (see image at top).
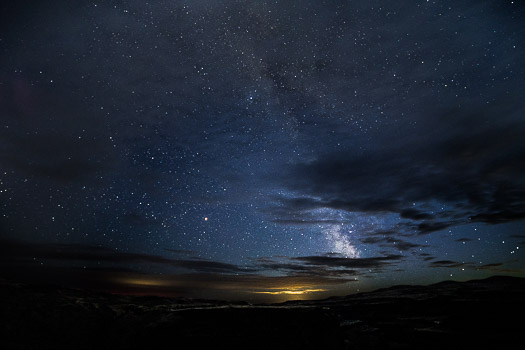
Dark sky shot. ISO 3200, 20 sec, f2.8.For the Milky Way, to keep things simple I rely on a single sky image. Here I shot a 14mm f2.8 lens wide open at ISO 3200 for 20 seconds. It helped that I was using the low-noise Sony A7 III. I sorted through a bunch of similar exposures, each with clouds blocking sections of the Heart. I chose one that best moved the eye back toward the center.
To enhance the stars, in Lightroom I pushed the contrast and highlights to +100, then added even more contrast with the Adjustment Brush. Selective adjustment of exposure was needed to reduce vignetting (note: I found the Lightroom Vignetting tool inadequate for this task).
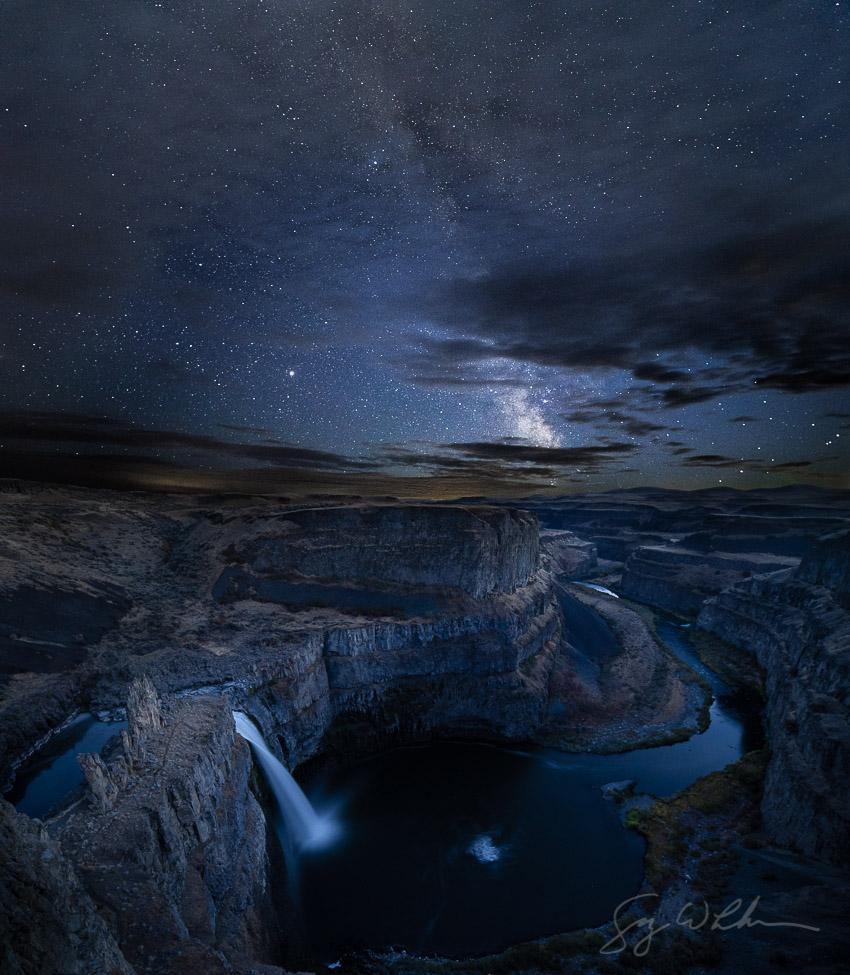
My Milky Way sky wouldn’t merge with the selected canyon image (shot 26 minutes apart) using Lightroom Merge Panorama, I think because the small bit of foreground in the sky shot was so black. So I brought the two images into Photoshop, and merged them after an easy Magic Wand sky selection in the canyon shot. I returned to Lightroom for finishing.
Two above images combined to create vertical panorama in Photoshop.I have to say the result exceeded expectations.
Gary
7 thoughts on “Milky Way at Palouse Falls 2018_10”
Great shot showing great technique. It’s instructive to see all you did.
One suggestion that might (might!) address the cloud cover: you might want to try to use a tool like Zerene Stacker that is used to merge multiple focus shots. If you are lucky, it would chose to keep all the stars. Worth a try anyway.
I intended to give the multiple image strategy a try here, but I gave up the idea with the numerous clouds. The A7 III does a pretty good single-image job, and it’s simple, but stacking, as you suggest, would be generally superior. Thanks for the post.
Impressive Gary, both the shot and the process. It’s a dynamic location and you captured it well.
Thanks, Robert!
Wonderful Image and Post Processing. Finding the location, using the planning tools, setting up and
taking the image, and executing PP are all wonderful skills. Standing on the cliff in the dark might need some practice!!! Well done!
I need to come over to your house sometime and have you show me your process. Your shots are amazing !!!!
I have to say, Jay, I don’t do anything that special. But pick a rainy day, I’m probably available.